How to use WooCommerce
Installation
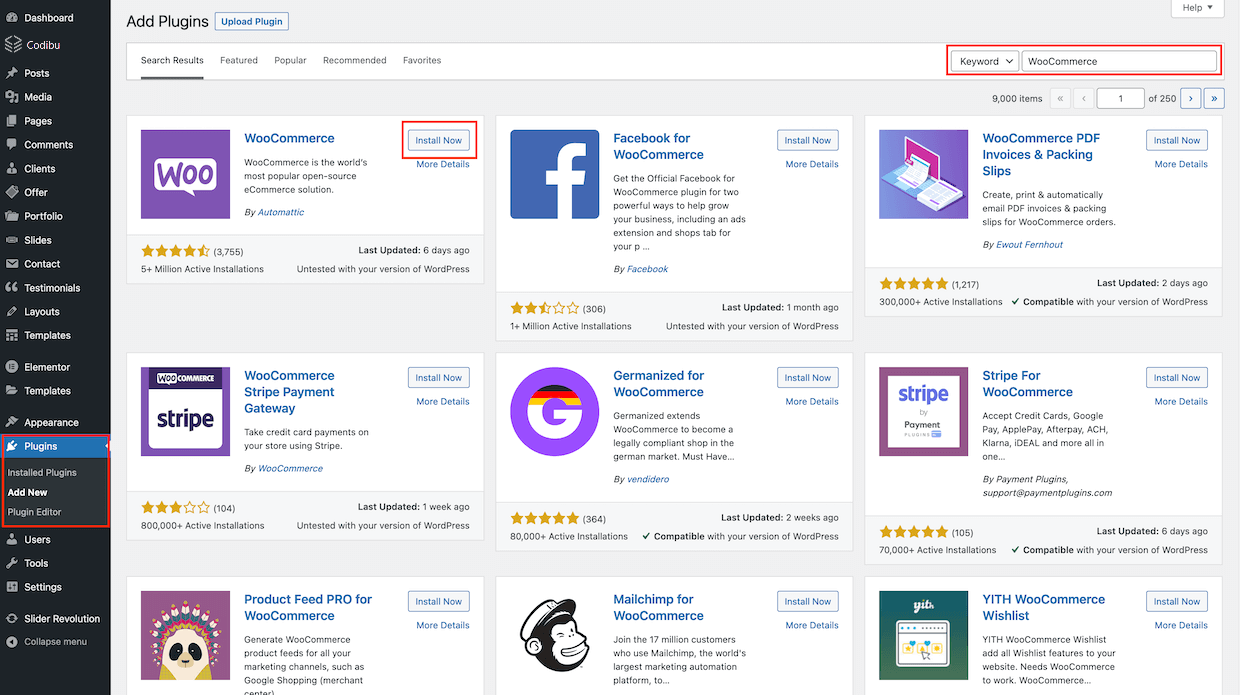
But let’s start from the beginning. At first, glance, let’s install WooCommerce. For this purpose:
And in the right top field, search for the WooCommerce keyword. After that, on 1st place, you will have the WooCommerce plugin, and all you have to do is click Install Now button. That’s it, the plugin is ready to use.

Assigning the shop page
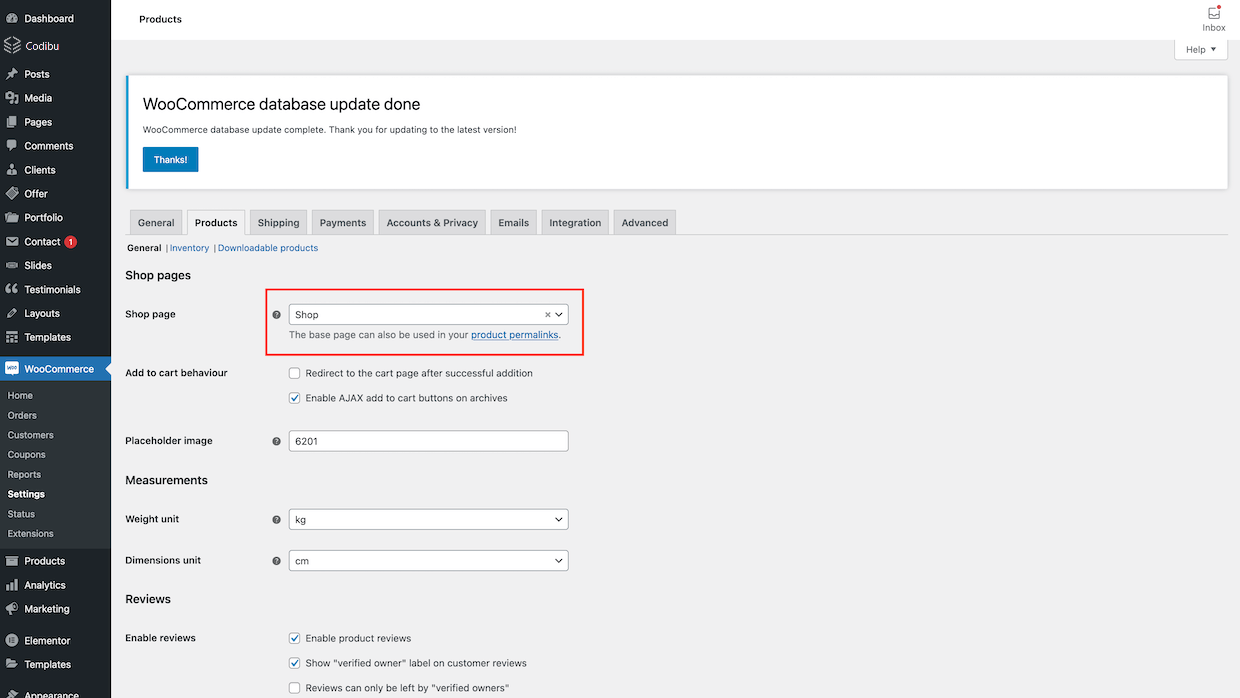
WooCommerce provides Setup Wizard after the installation process. However, if for some reason it did not appear, or you missed it, please follow the steps below to set it up manually.
and select the page you would like to be the SHOP page. That’s it. From now on, WooCommerce will display a product list on this page.

Quick Tip!
Set further options!
It’s worth creating another page for cart, checkout, my account, or terms & conditions and assign them in the Advanced tab of WooCommerce. You will avoid common mistakes and save much time by resolving it!
Adding products
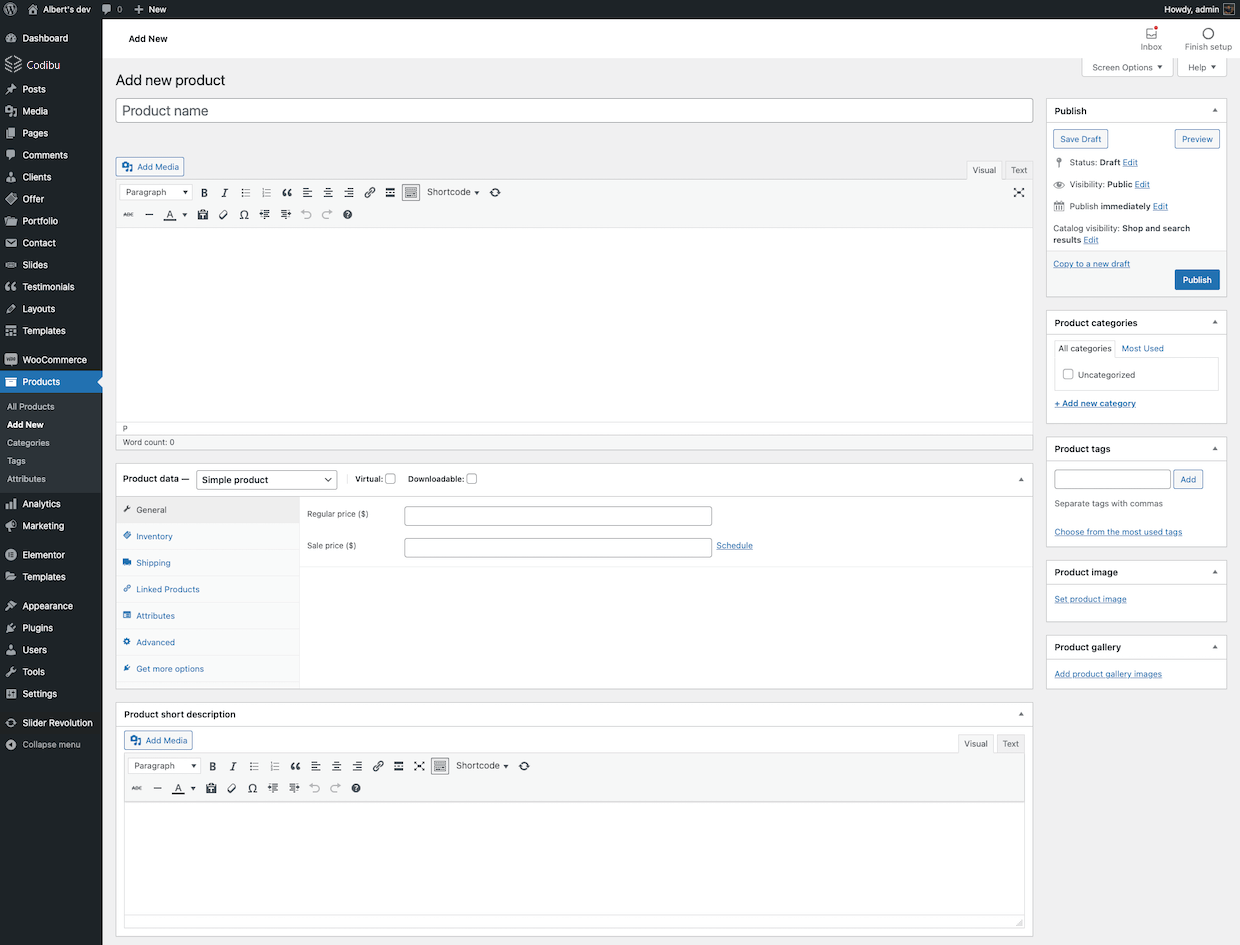
Adding products is extremely simple. To add it, please
This page contains many windows for a comprehensive presentation of the product. All you have to do is just populate them with information about the product. Please check Woo Doc if you need more information about adding products.

Adjusting product image sizes
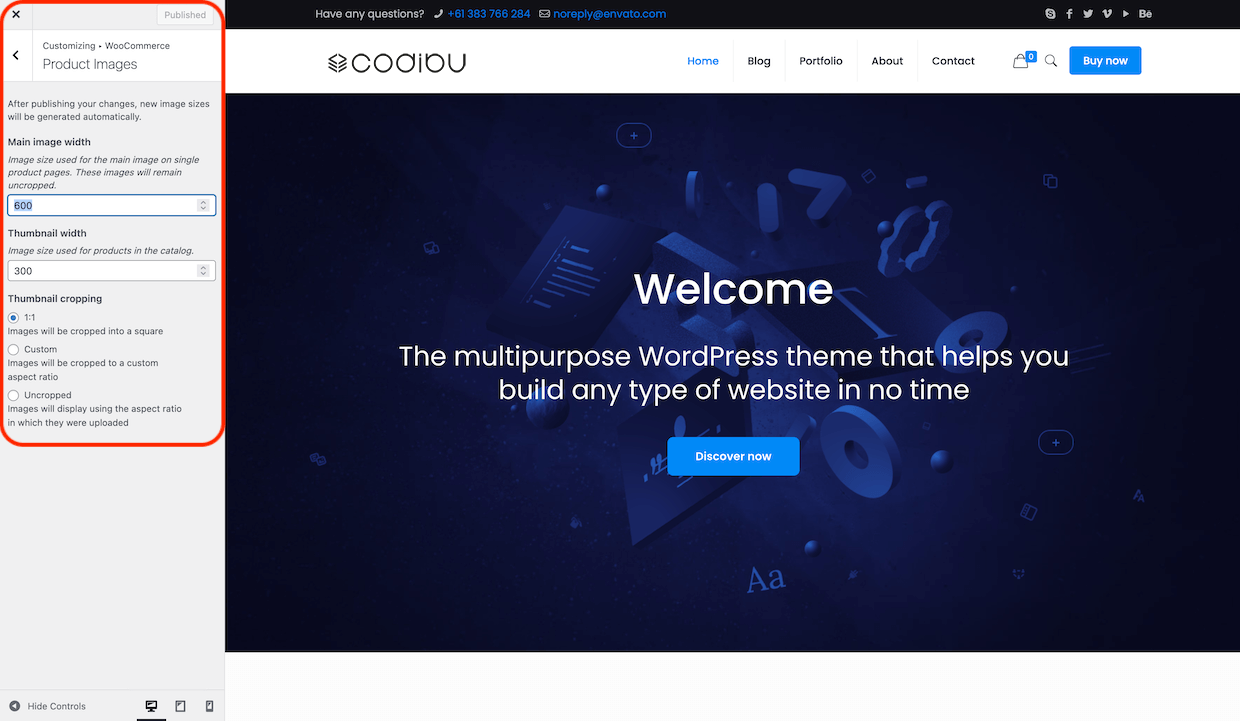
Woocommerce provides the possibility to adjust image sizes by default. It is really important to consider the sizes you would like to use according to your shop layout. For example, if you want to present one product per row, you can not set a size like 300×300 because such an image won’t be large enough. Therefore, if you don’t like how product images look on your site, you probably have to increase their size. To do that, please
and set its width and height. After any change, you have to regenerate thumbnails. For that, we recommend using the Regenerate thumbnails plugin.

