WooCommerce has a built-in product CSV importer and exporter, as of version 3.1x.
Import, export or update hundreds or thousands of products in your WooCommerce store with a single CSV. This tool supports all product types, including variations.
- First-time store owners get started more quickly by exporting and importing products during setup.
- Existing store owners can update tens or hundreds of products with new info or place them on sale, or sync multiple storefronts.
Create your CSV
To import new products or update existing products, you need a CSV containing your product information. You can:
- Export a CSV of products from an existing store.
- Download a CSV file with sample data from GitHub and replace it.
- Use your own CSV. Any information you wish to include should follow the formatting and columns of the Product CSV Import Schema.
If using the built-in WooCommerce Product CSV Importer and Exporter tool to export a CSV, it already follows the schema and is ready to use. If using the blank and formatted CSV file, it also follows the schema; just be sure to enter the info as instructed at Product CSV Import Schema.
General guidelines
- CSVs should be in UTF-8 format.
- Dates should be defined for the store’s local timezone.
- Use 1 or 0 in your CSV, if importing a Boolean value (true or false)
- Multiple values in a field get separated with commas.
- Wrapping values in quotes allows you to insert a comma.
- Prefix the id with
id:if referencing an existing product ID. No prefix is needed if referencing an SKU. For example:id:100,SKU101 - Custom meta is supported/imported but only plain text – no support for JSON or Serialized data.
- Taxonomy term hierarchy is denoted with
>, terms are separated with commas. - Draft products are not exported, only published and privately published products.
Images
- Images need to be pre-uploaded or available online to import to your store.
- External URLs are supported and imported into the Media Library if used.
- You can define the filename if the image already exists in the Media Library.
Import
Adding New Products
First-time and existing store owners using WooCommerce can use the CSV to add new products with one upload.
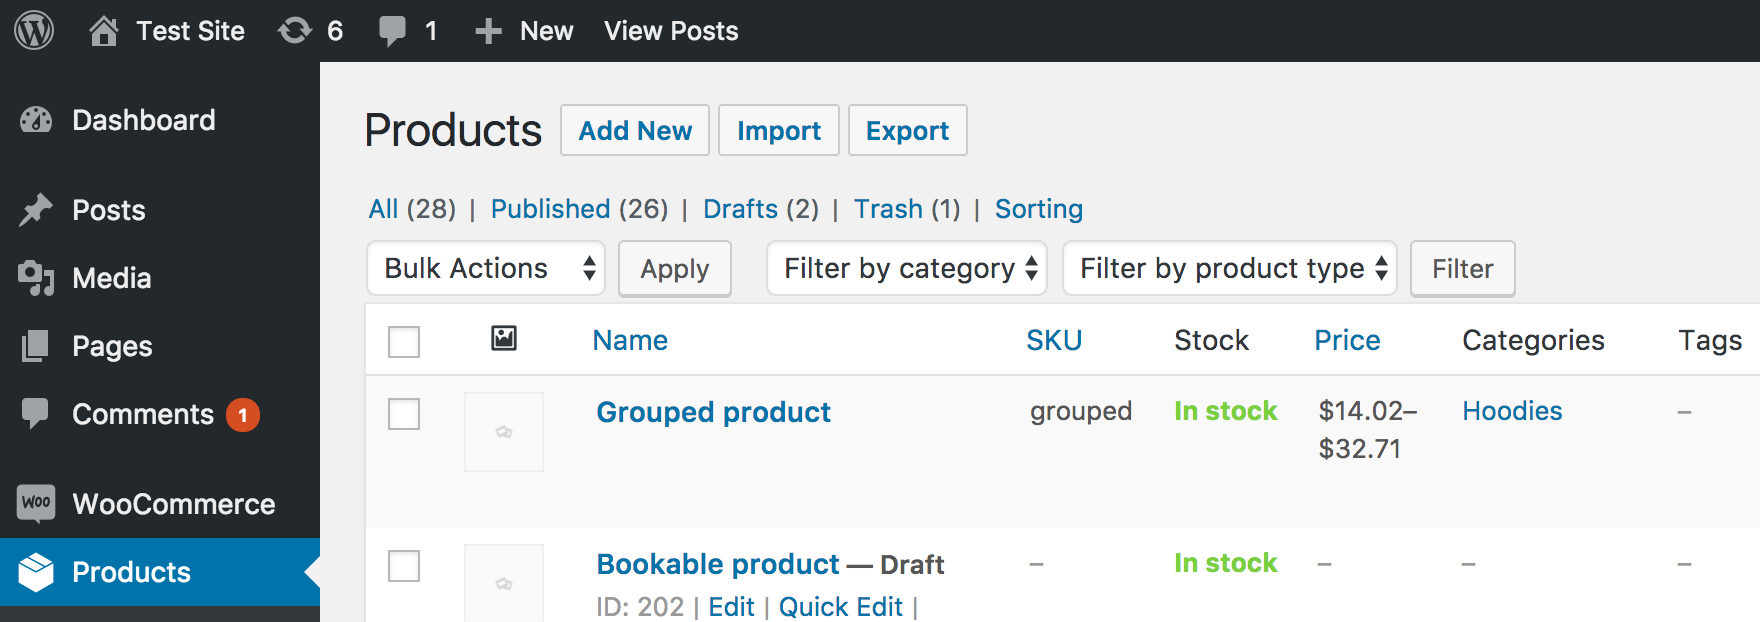
1/ Go to: WooCommerce > Products.
2/ Select Import at the top. The Upload CSV File screen displays.
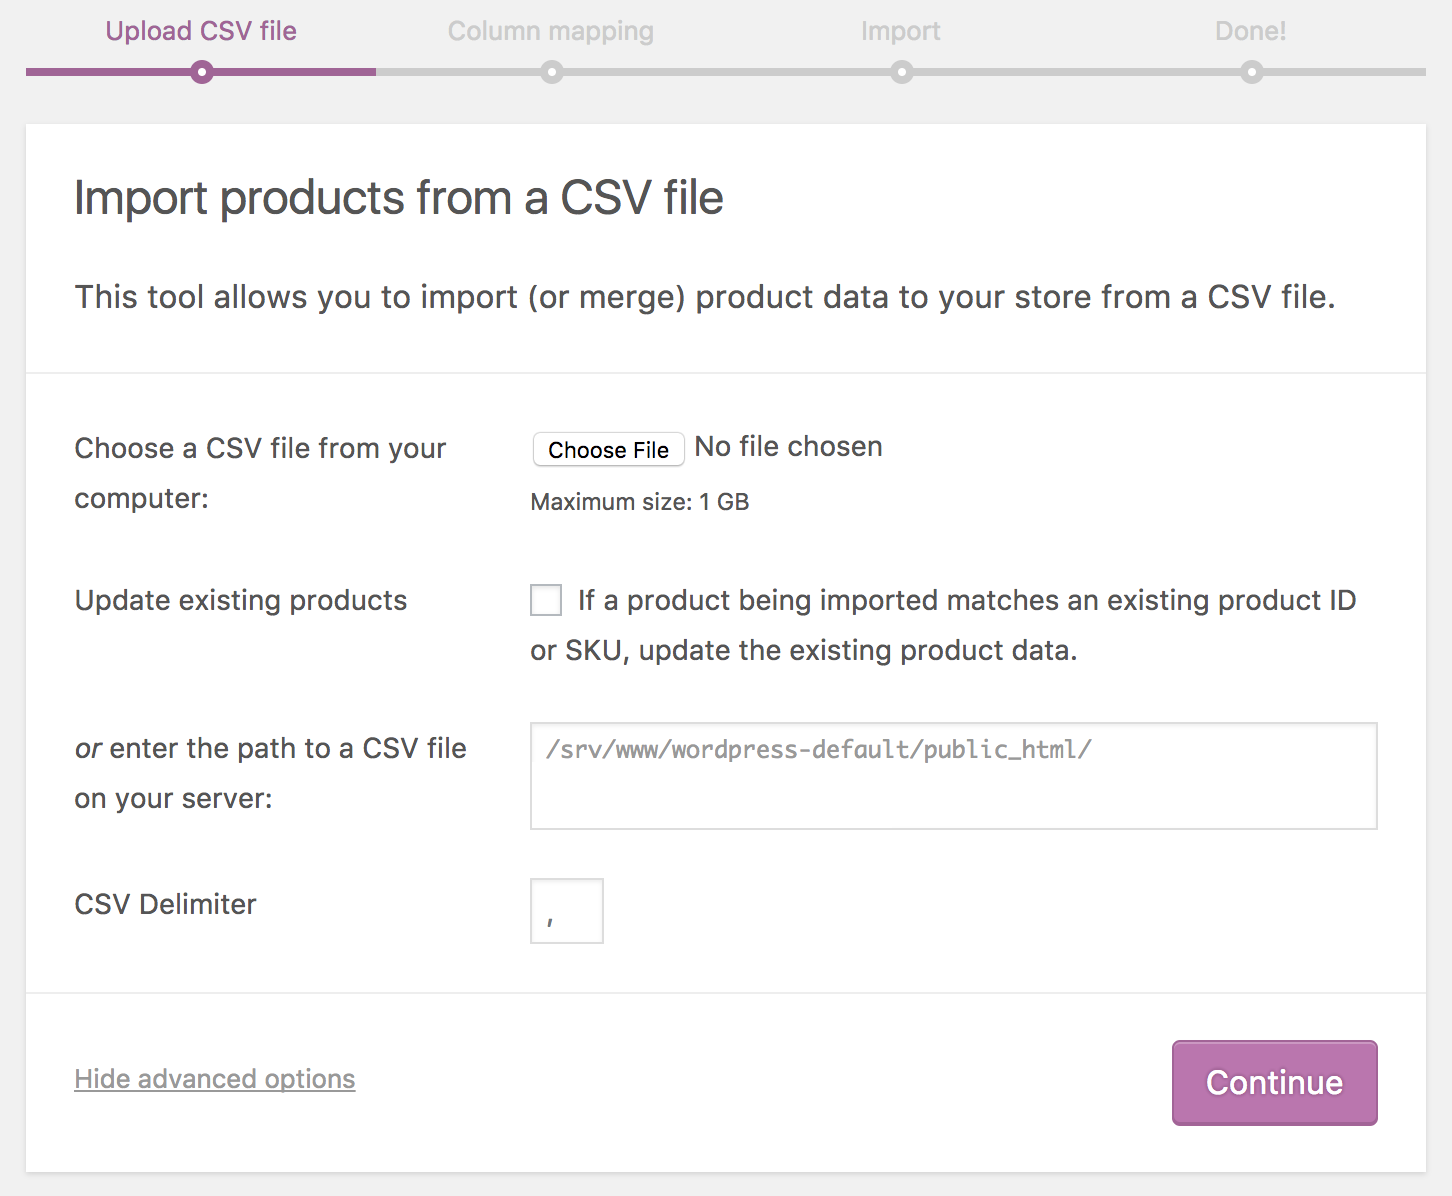
3/ Select Choose File and the CSV you wish you use.
CSV delimiter (Advanced option): Generally CSV elements are separated by a comma. If you are using a different delimiter in your file, you can set it here.
4/ Continue.
The Column Mapping screen displays, and WooCommerce automatically attempts to match or “map” the Column Name from your CSV to Fields.

5/ Use dropdown menus on the right side to adjust fields or indicate ‘Do not import.’
*Any unrecognized columns will not be imported by default.
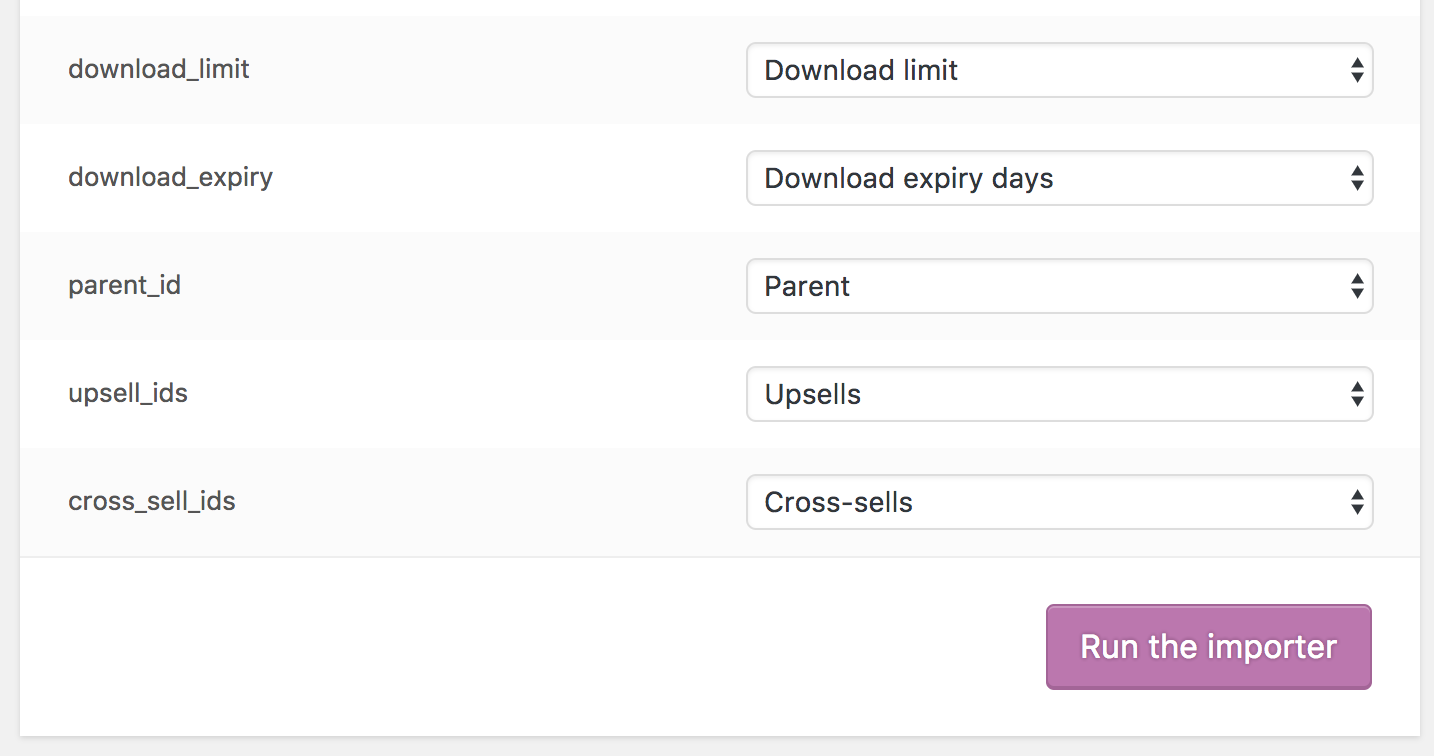
6/ Select Run the Importer.
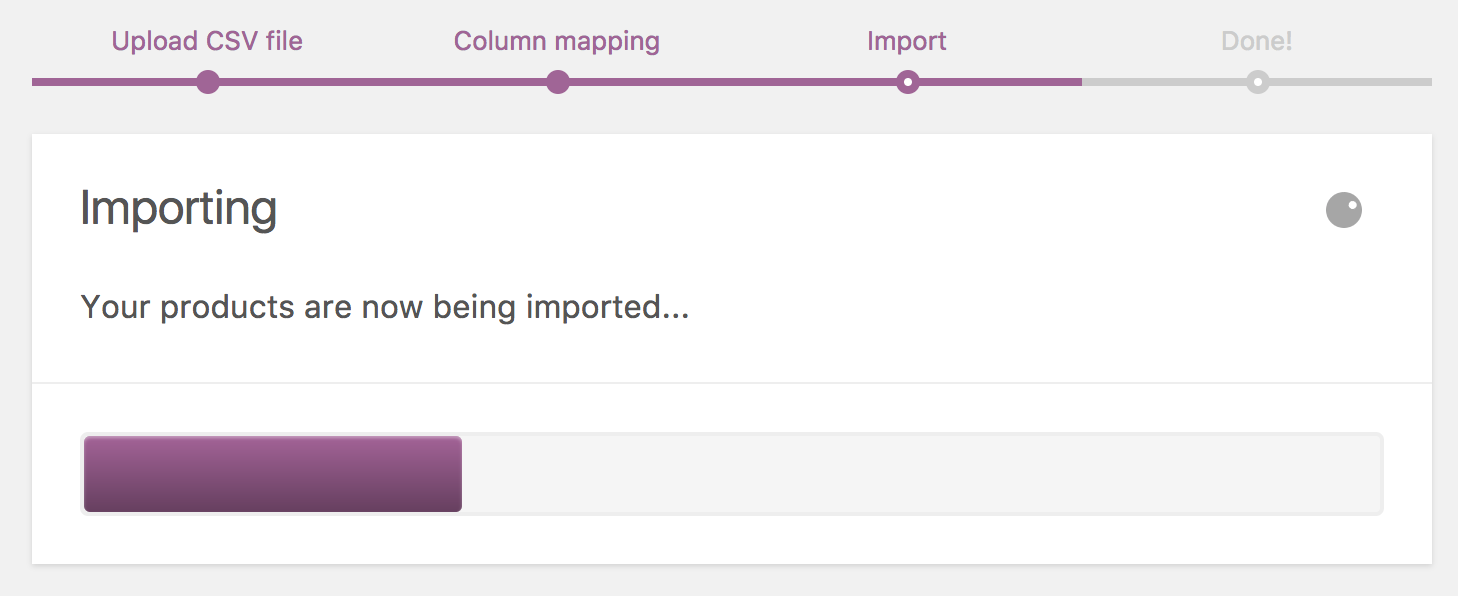
7/ Wait until the Importer is finished. Do not refresh or touch the browser while in progress.

Update Existing Products
Store owners can use the CSV Importer tool to update existing products with new info, e.g., Adding a brand, changing a tax class, bulk-update for a special sale or event, etc.
1/ Make a CSV file as indicated in Create Your CSV, using the IDs and/or SKUs of products you wish to update.
The importer uses the ID and/or SKU to auto-match and auto-update whatever info you enter on each line.
2/ Go to: WooCommerce > Products.
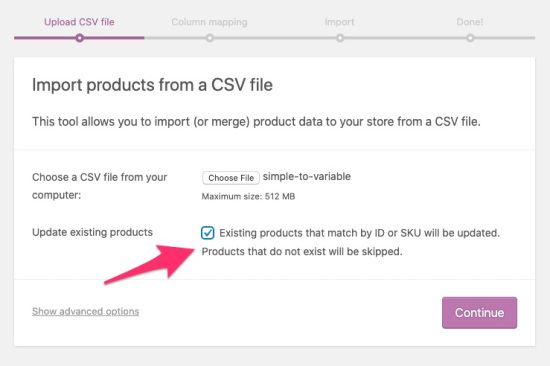
3/ Select Import at the top. The Upload CSV File screen displays.
4/ Select Choose File and the CSV you wish you use.
5/ Tick the checkbox for Update Existing Products.
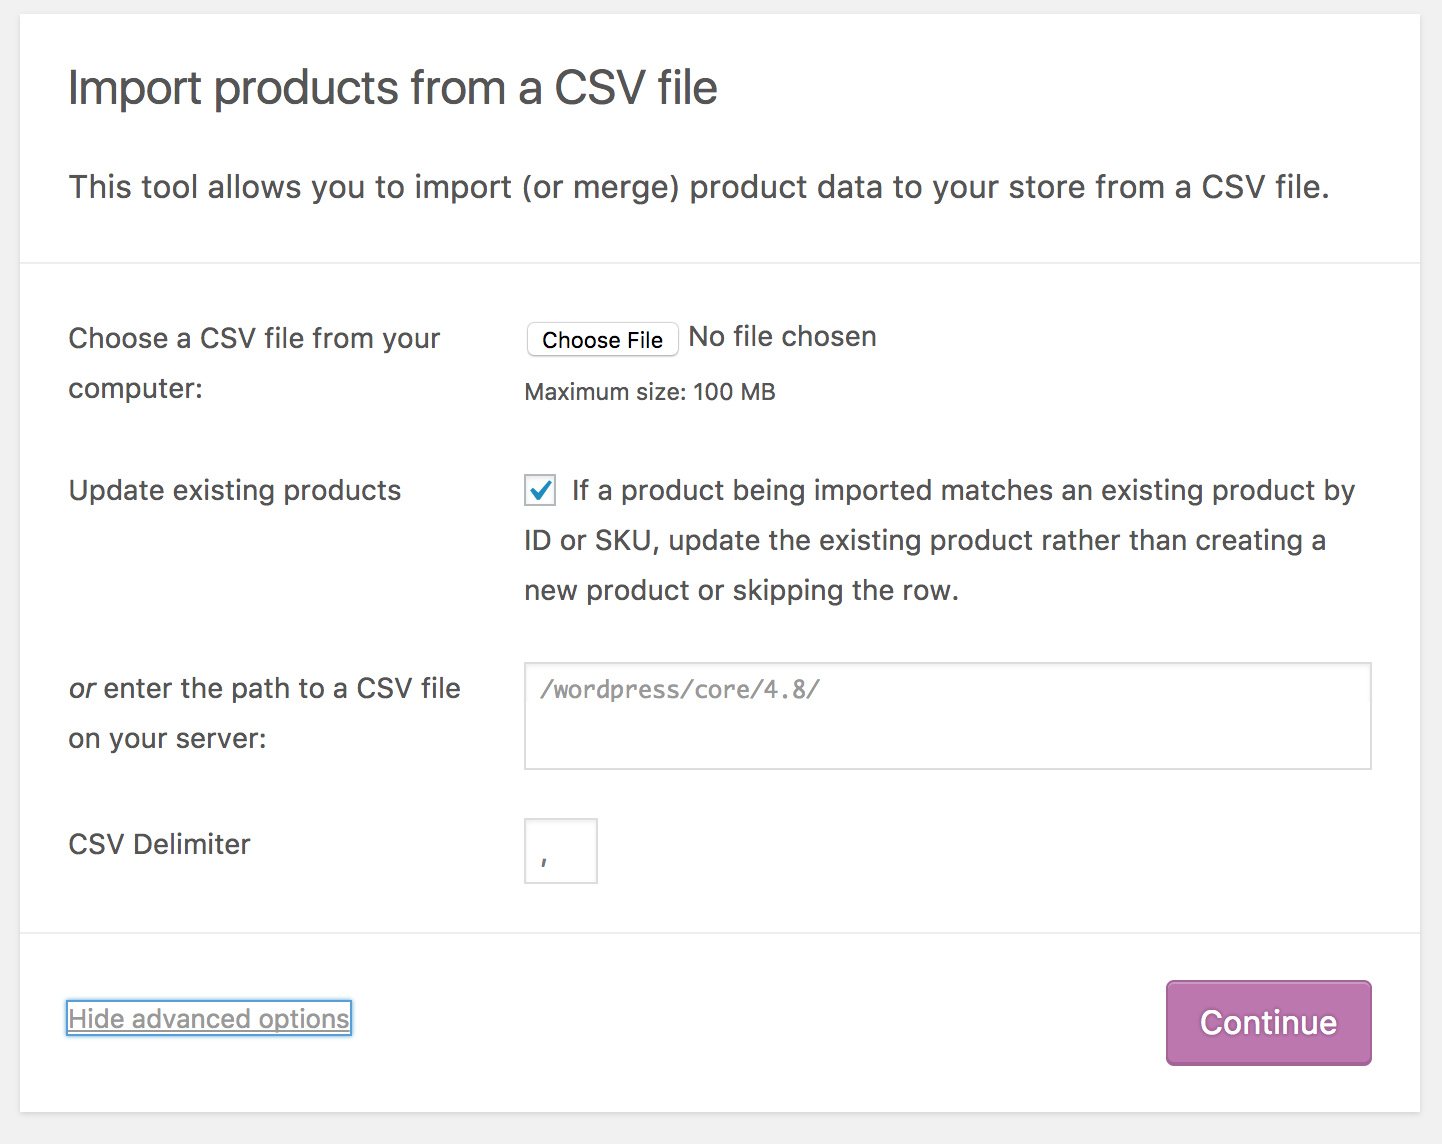
6/ Continue.
The Column Mapping screen displays, and WooCommerce automatically attempts to match or “map” the Column Name from your CSV to Fields.
7/ Use dropdown menus on the right side to adjust fields or indicate ‘Do not import.’
*Any unrecognized columns will not be imported by default.
8/ Select Run the Importer.
9/ Wait until the Importer is finished. Do not refresh or touch the browser while in progress.
Converting existing simple product to variable product
Store owners can use the CSV Importer tool to convert the existing simple product to a variable. In order to do that, the following steps need to be taken:
1/ Create a simple product that has a price and SKU.
2/ Export product via built-in CSV Exporter on the All Products page.
3/ Open CSV file and convert the simple product to a variable. Steps that need to be taken for it (for example to convert to a variable product with 1 attribute and 2 variations):
- Add 2 new rows
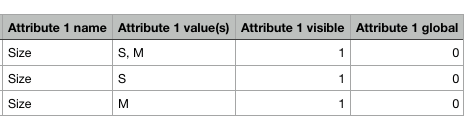
- Add 4 new columns after the last column:
-
Attribute 1 name Attribute 1 value(s)Attribute 1 visibleAttribute 1 global
In our case, we are adding Size variations so our new 4 columns look as follows:
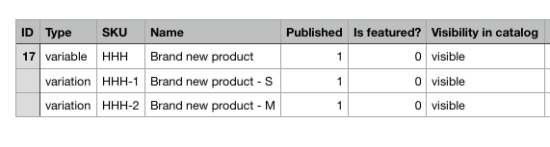
- Change the type of the product from
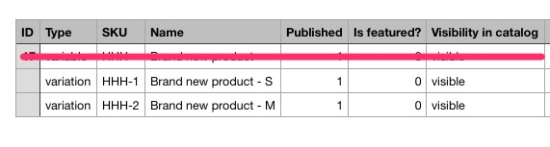
simpletovariableand add typevariationto variation rows (2 new rows that you created). Add SKU to variation rows. Give it a name as well. It looks like this in our example:
- Update the following columns as well (and any other columns if needed):

- Very important – add SKU to all fields in the
Parentcolumn – this is to map parent product with its variations:

4/ Save a new CSV file.
5/ Import the updated CSV file back to the site using built-in CSV Importer on All Products view.
6/ Select to update existing products before import since we want to update the
existing product on the site:
7/ Proceed with import (nothing to be mapped).
8/ You will see the following which is expected:
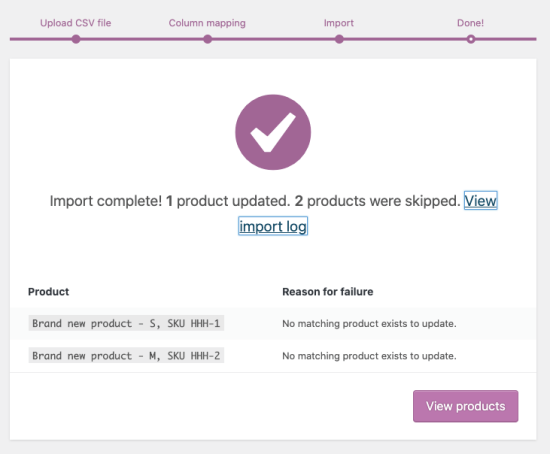
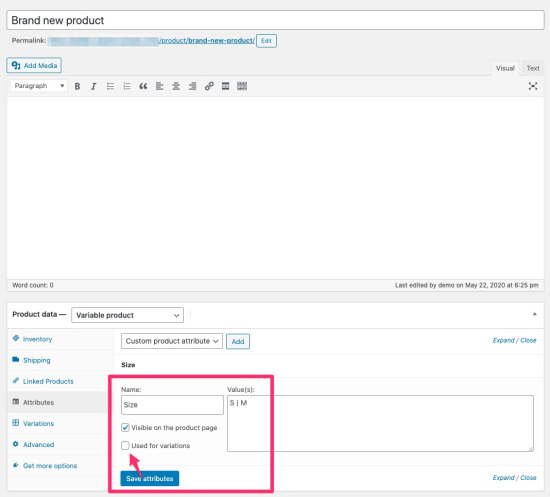
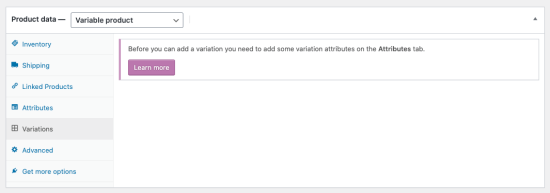
9/ Navigate to the product. You will see that it is now variable and has 1 attribute added but no variations were created. Note that Used for variations checkbox is not selected. This is also expected:

10/ Next, open the CSV file again (the one where you already created rows for variations) and delete the parent product row. Leave variations rows without changes:

11/ Save the updated CSV file.
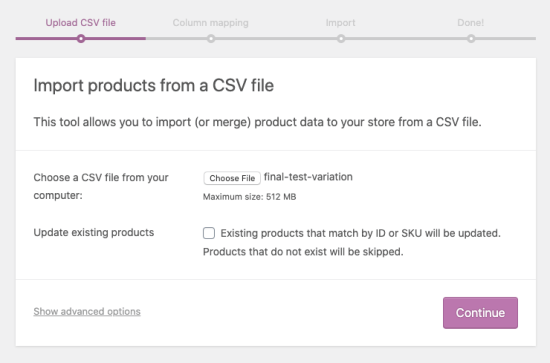
12/ Next, import updated CSV file to the site but this time don’t select the box next to Update existing products:
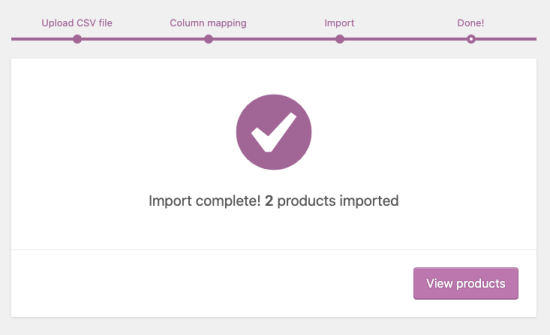
13/ Proceed with import (no fields need to be mapped). You should see that variations have been imported:
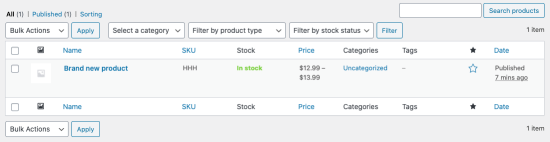
14/ After completing the import, navigate to the product. It should now be a variable product with variations:

Export
Store owners wishing to export their current catalog of products for any reason can generate a CSV using the Product Importer/Exporter.
1/ Go to: WooCommerce > Products.
2/ Select Export at the top. The Export Products screen displays.
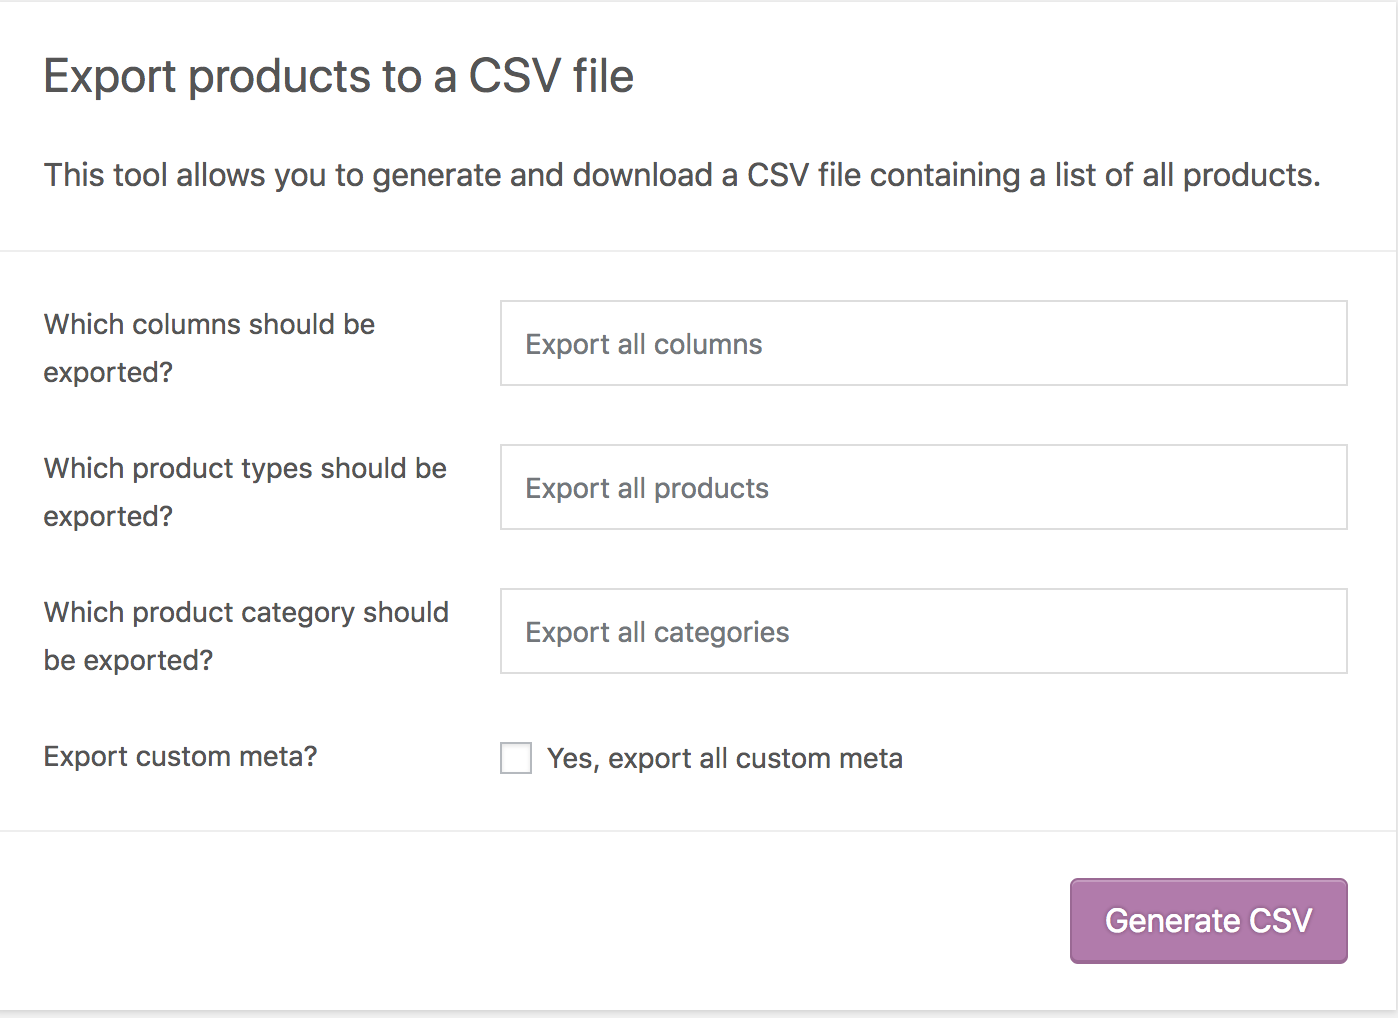
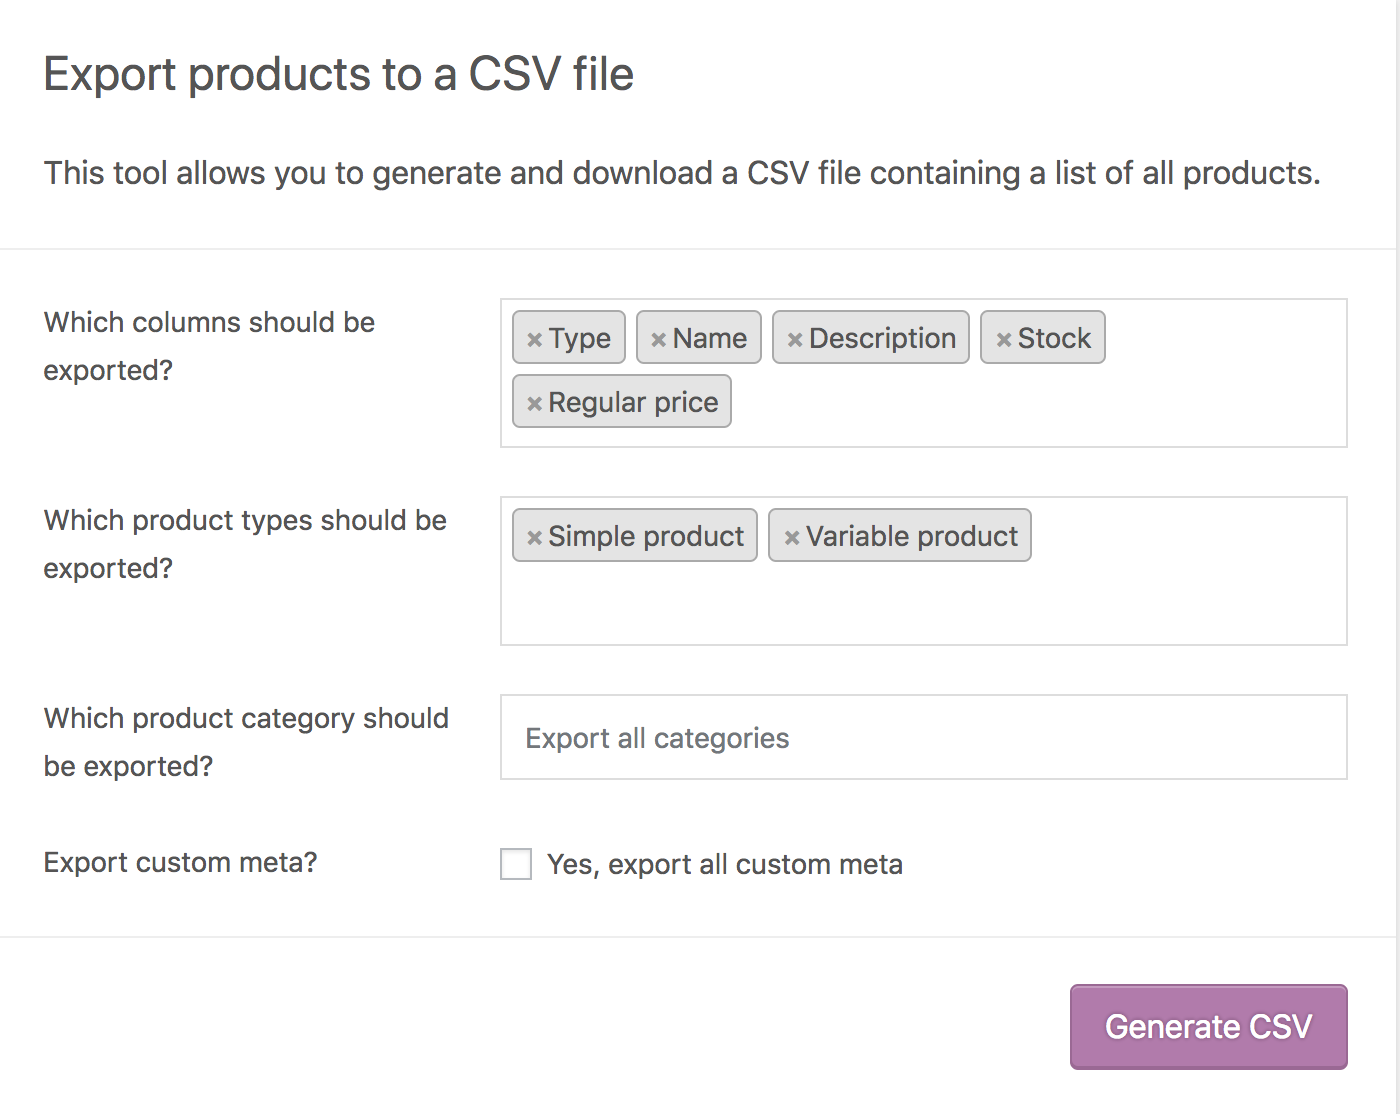
3/ Select to Export All Columns. Or select which columns to export by using the dropdown menu.

4/ Select to Export All Products. Or select which product types to export by using the dropdown menu.
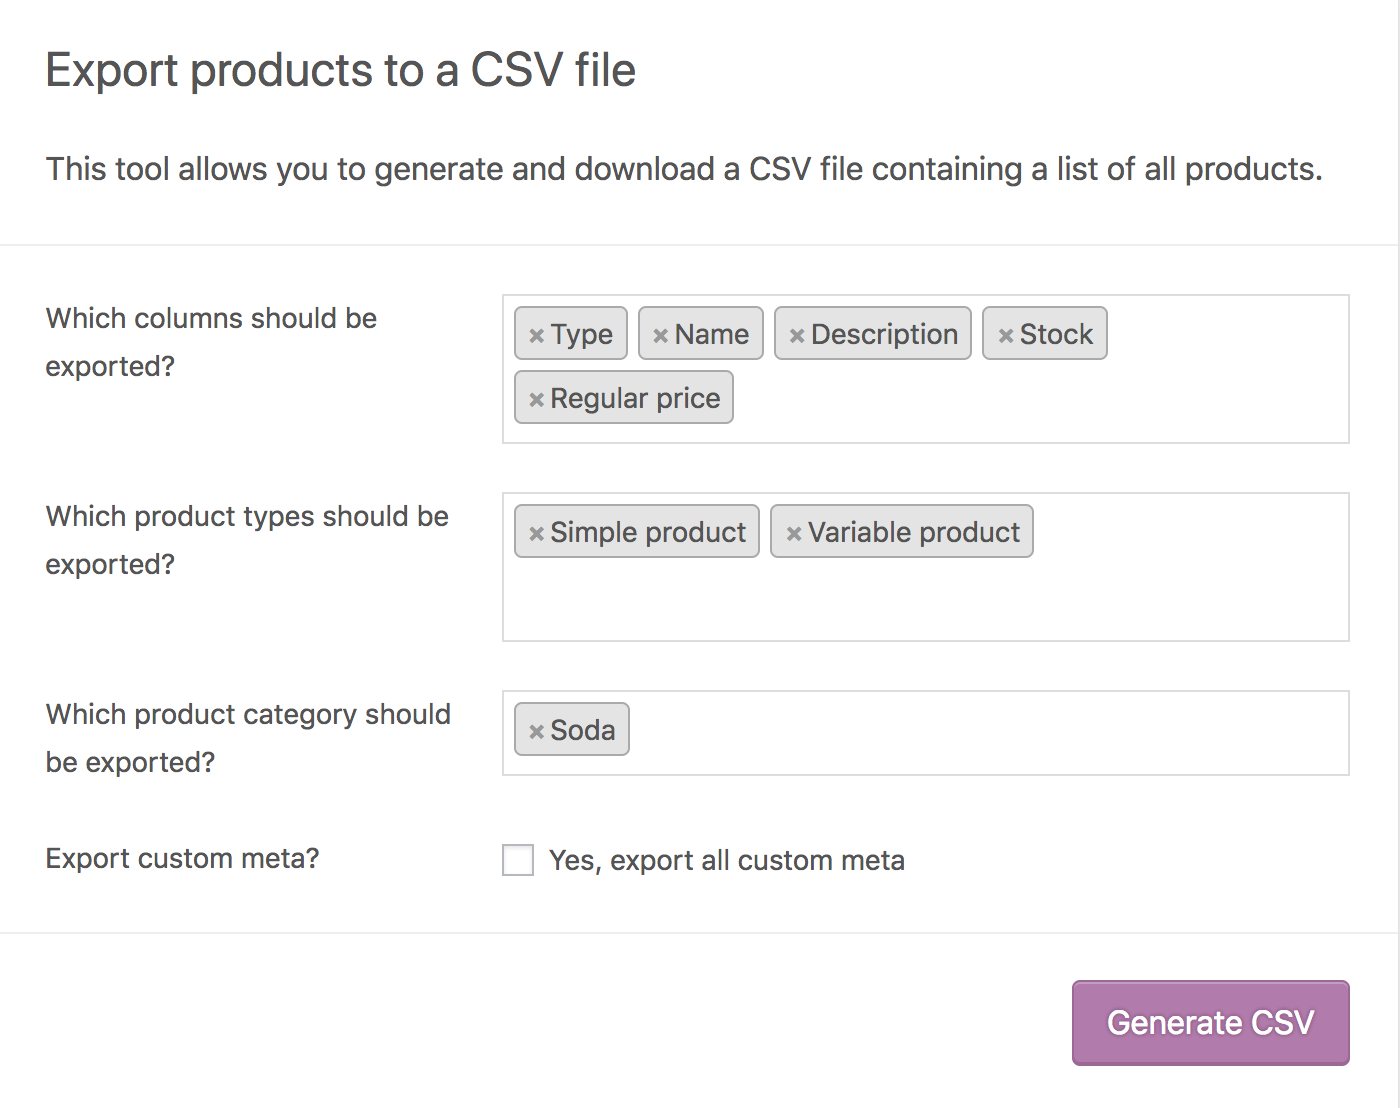
5/Select to Export All Categories. Or select which categories to export by using the dropdown menu.
6/ Tick the box to Export Custom Meta, if you need this info.
Meta data on your products is typically from other plugins. Meta data columns are exported following the meta:-prefix standard detailed above in the importer mapping section. By default, no additional meta data is exported.
7/ Select Generate CSV. Wait for the export to finish.
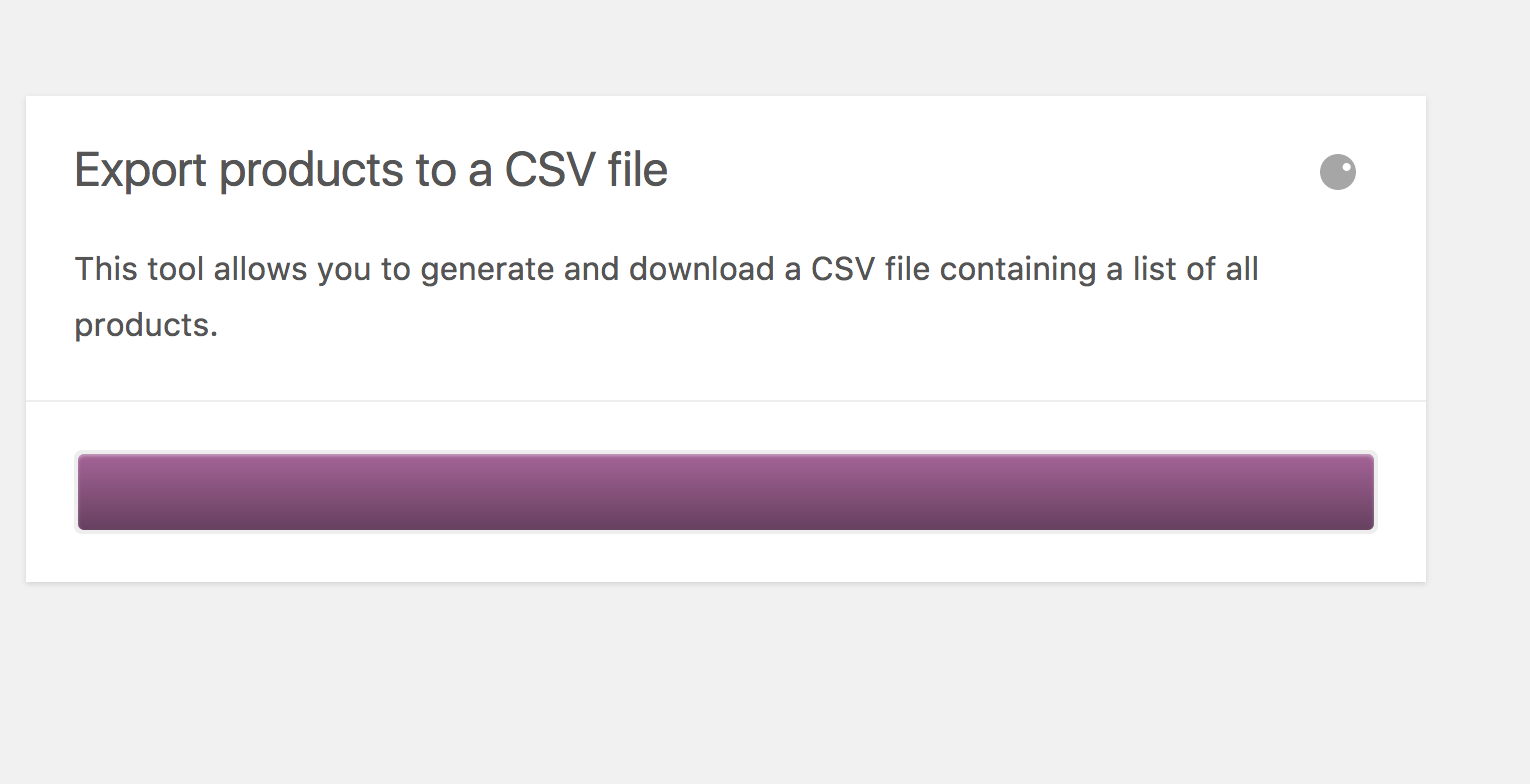
8/ Exit the exporter.
FAQ
Is it possible to add custom import columns?
Yes. Feel free to visit the WooCommerce repo at GitHub to see the custom code at Adding Custom Import Columns. Be aware that is Developer level info for which we provide no assistance under our Support Policy.
Is it possible to add custom export columns?
Yes. Feel free to visit the WooCommerce repo at GitHub to see the custom code at Adding Custom Export Columns. Be aware that this is Developer level info for which we provide no assistance under our Support Policy.
Why aren’t all my products exported?
Previous to WooCommerce 3.6.5, only products with a status of ‘publish’ or ‘private’ were exported, not those in ‘draft.’ If you want to change that, there’s a filter you can use, but this would require custom coding, which we can’t provide assistance with.
Why aren’t all of my products imported?
Previous to WooCommerce 3.6.5, only products with a status of ‘publish’ or ‘private’ were imported, not those in ‘draft.’ As of WooCommerce 3.7, CSV product import now allows true/false values for the published field, as well as the original 0 (private), -1 (draft), 1 (publish) values.
Permission error when importing?
Are you seeing the following permission error when importing your CSV file?
Sorry, this file type is not permitted for security reasons.
When an import file contains HTML the file type can be mis-detected by WordPress on some servers. One workaround is to add the following line to your wp-config.php file:
define( 'ALLOW_UNFILTERED_UPLOADS', true );
For security reasons you can only enable this temporarily for the time of import, and then remove it again from the configuration file.
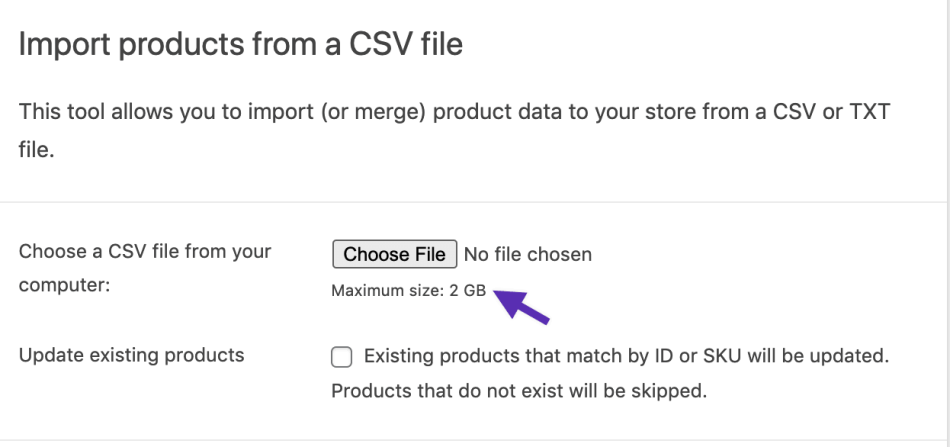
How to increase the CSV import maximum size?
The Maximum size value is set at the server level. To increase the maximum file size, please contact your hosting company. As a workaround, you can split the CSV into multiple parts to upload separately.