
When you first install Memberships, you may want to get set up as quickly as possible so you can see what it looks like in action. This guide takes you through the most basic steps to get a membership site created, and links to additional documentation for more information.
For the sake of brevity, this guide will assume that any members-only content has already been created on your site.
Installation
Once you’ve purchased WooCommerce Memberships, you can download the plugin from your confirmation email or WooCommerce account. To install it, follow these steps:
- Go to Plugins > Add New > Upload
- Select the ZIP file you just downloaded
- Click Install Now, and then Activate
Once you’ve installed and activated the plugin, you can go to WooCommerce > Settings > Memberships to configure the plugin.
Setup and configuration
If you want to get started quickly, you probably don’t need to adjust any of the Memberships settings, which should work for most shops. Restricted content will include the title and featured image when displayed on your site and an excerpt will be shown, but full content will not be accessible.
If you’d like to change your restriction mode or edit restriction messages, you can take the time to do so (more details in the settings document). Otherwise, you can move on to creating your membership product.
Sell your membership
If you only want to manually grant access to memberships on your site, you can skip this setup step. If you’d like to sell membership access, you’ll need to create a product to do so.
Memberships are not a particular product type; instead, they can be tied to any kind of product on your site. This lets us support granting access to a membership from any type of product, including simple products, a variable product, a particular variation of a product, a simple subscription, a variable subscription, a particular subscription variation, etc.
To sell your membership, create the kind of product you’d like to use to sell it. For example, if I want to sell a one-year membership to my site, I can create a simple product with the membership cost as the price:
We’ll later tie the membership to this product.
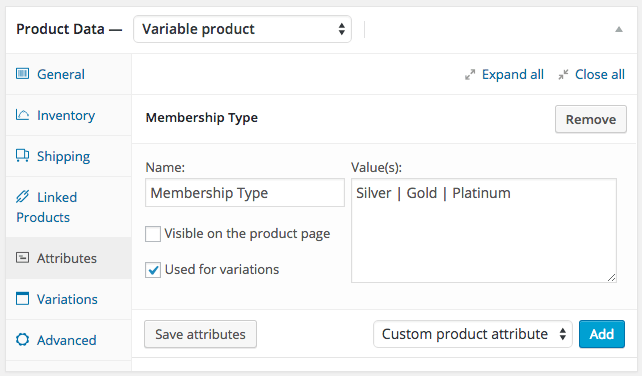
I can use any other product type if desired, such as variable product. I can tie different memberships to each variation if desired.
Once you’ve created the product(s) that you’ll use to sell the membership, you can set up the membership plan.
Create a membership plan
To create your membership plan, go to WooCommerce > Memberships > Membership Plans, and then click “Add Membership Plan”. This will let you create your first plan. If you want more detailed instructions on creating plans, you can view the membership plans document.
General plan details
Name your plan (you can skip the “slug” field) and determine how members should get access to this plan: only when you create a membership manually, via registering for an account on your site, or via purchase. I’m going to provide access when the membership product I just created is purchased, so I’ll search for the name of that product.
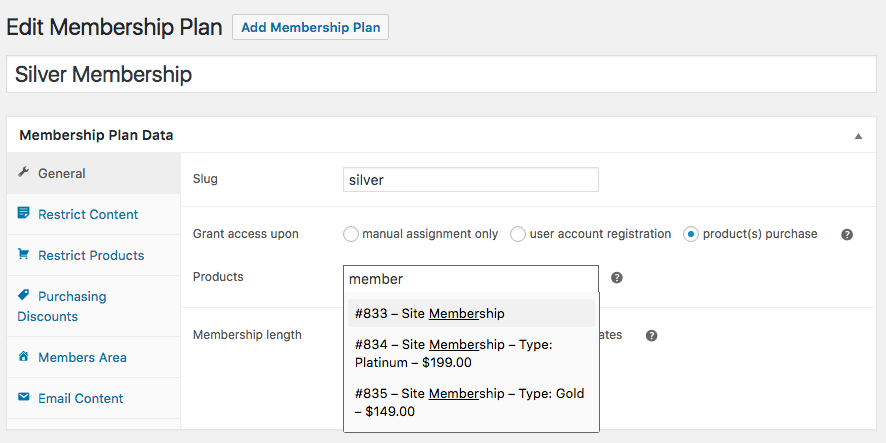
I’ve chosen to use a variable product. Notice that I can choose to grant access when any variation of that product is purchased (by selecting the parent product), or I can tie this membership to a particular variation. I’m going to to tie the silver membership to the silver variation.
Next, determine how long member access should last. A membership can be unlimited (never expires), a specific length (from the creation date), or between a set of dates. I’m going to create my membership for a length of time.

Restrict content to members
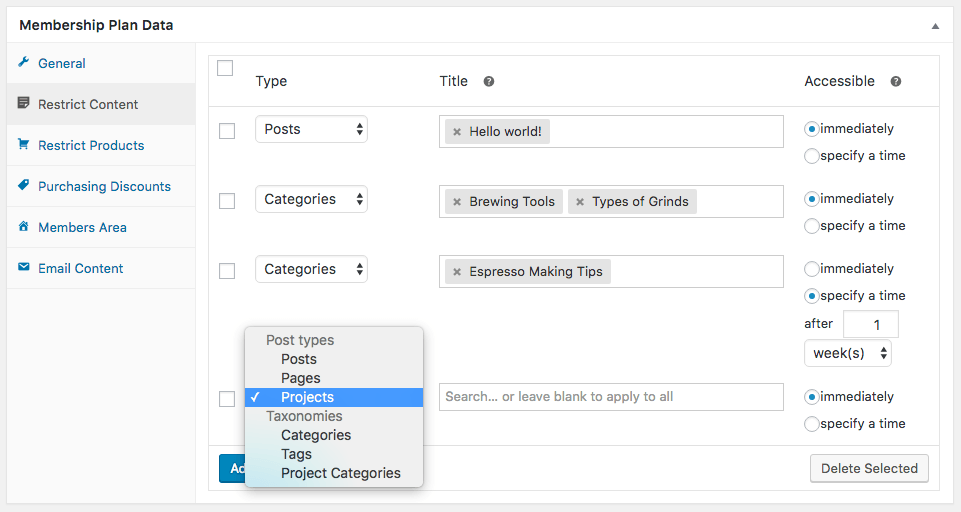
Once you have basic plan details configured, progress to the “Restrict Content” tab. This will let you restrict access to pages, posts, or custom post types (such as portfolios or other content) to members. I can also restrict taxonomies like categories or tags.
Currently, all of your content is public. If you add content to this tab, it will no longer be public, and will require this membership (or another that grants access) to access it. The content will be restricted as soon as your membership plan is published.
If you need more time to create your plans, you can save the plan as a draft, and rules will not take effect.
Select the content type to restrict. If you want to restrict all content for that type, leave the “Title” field blank. If you want to restrict certain posts or pages, search for them and select them. Determine when access to the content should be granted (immediately or after the customer has been a member for a certain length of time).
Once you’ve restricted content, you can restrict products in the same way: select the type to restrict, select individual products or categories if desired, and set content dripping if needed.

If you’d like more details on restricting content or posts, you can view the restricting content document. This also has details on using shortcodes to restrict content.
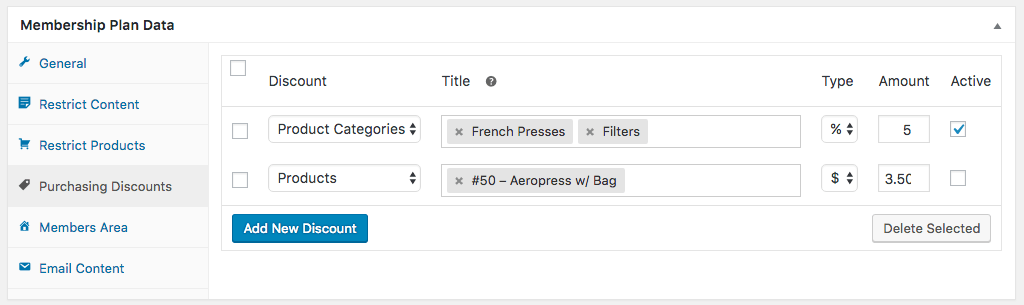
Create member discounts
You can set up member discounts if desired. If a discount is active, it will automatically be applied to the selected products for logged-in members — no coupon is needed. It’s basically a members-only sale price. That means that there will be no mention of the discount on the back-end and the members-only price change will be applied to all specified products everytime a member purchases one of them. If you’d like to provide your members with a coupon they can use instead, you can check out the this blog post for more information.
Activate member area
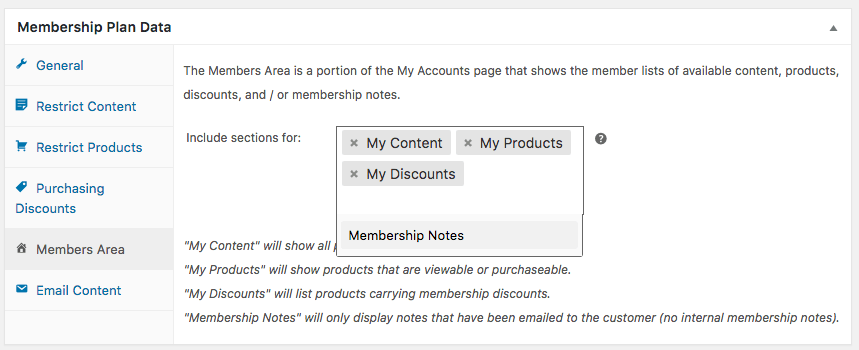
You can choose what members will see in the member area. This will let your members click “View” for a membership from the “My Account” dashboard. Members can then see content, products, and discounts assigned to the membership. You can enable the following sections:
- Content: Shows a list of all posts, pages, and custom post types the member has access to, or will have access to on a future date.
- Products: Shows a list of all products the member can view and / or purchase, or will be able to view / purchase in the future.
- Discounts: Lists all products the member has a discount for, including the discount amount.
- Notes: Displays a list of any member-facing notes for the membership (ones that have been added with “Notify Member” only).
- Manage: Shows the membership details, and links to subscriptions if used.
You can learn more about the Members’ Area under the Membership Plans document.
Customize email content
Member emails will be disabled by default, but you can enable them if you want to inform your members of upcoming expirations, when a membership ends, or prompt them to renew after a membership expires. These can be enabled under WooCommerce > Settings > Emails.
Under the “Email Content” tab, you can customize content for up to 3 emails if you don’t want to use the default content:
- Membership ending soon – This email can be sent 1 to 60 days before a membership ends to inform the member of the upcoming expiration, and / or ask them to renew before that happens.
- Membership ended – This email can be sent immediately when a membership ends to let the member know they no longer have access and potentially ask the member to renew.
- Membership renewal reminder – This email can be sent 1 to 60 days after a membership ends to encourage the member to renew. This email is only sent for renewable memberships (accessed via purchase).
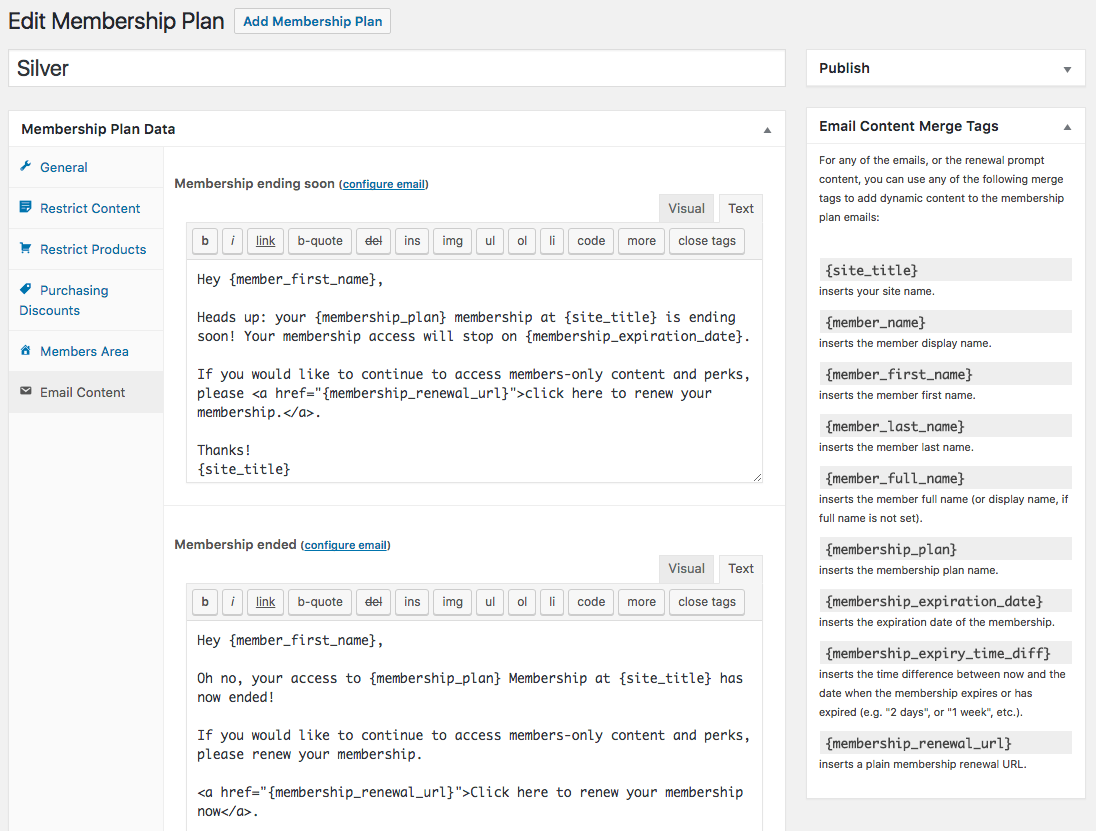
Any email can use the “merge tags” listed to personalize emails, such as the {member_name} tag to insert the member’s display name, or the {membership_renewal_url} to give members a link to renew a purchasable membership.
When you’re done creating your plan, save and publish it.
Your membership is now live; when a customer purchases your membership product, a membership will be created for the customer automatically (once the order is paid for), and the customer will gain access to the members-only content based on your rules and dripping.
Create / manage members
You can manually create members or view / edit existing memberships from the WooCommerce > Memberships > Members screen. Each member is a WordPress user and WooCommerce customer; the membership login and account is handled by WooCommerce, and Memberships adds additional information to the account, such as the Member Area.
If you’d like further details on creating or managing memberships, please view the user memberships document.
Creating new content
Once your membership products and plans are created, you’ll probably add new content or products to your site. You can quickly integrate them into your membership plans using the “Memberships” meta box.
When you add any new pages, posts or other content, you can restrict it to a certain plan, and customize the “content restricted” message displayed to non-members. If a rule already applies to the content (i.e., a taxonomy rule applies), it will be displayed and disabled from editing. You can edit it from the plan page.
If rules apply, you can also opt to make this content public, which overrides all restriction rules for all plans to make the content completely public (version 1.1+).
When you add new products, you’ll see a different meta box. This is because you can restrict products to a membership plan, but you can also create discounts on the product for certain members, or this new product could grant access to an existing plan.
The product Memberships meta box therefore has multiple tabs to account for this. You can use it to restrict the product to a plan, grant access to an existing plan when this product is purchased, or set up a discount on this new product for a plan.
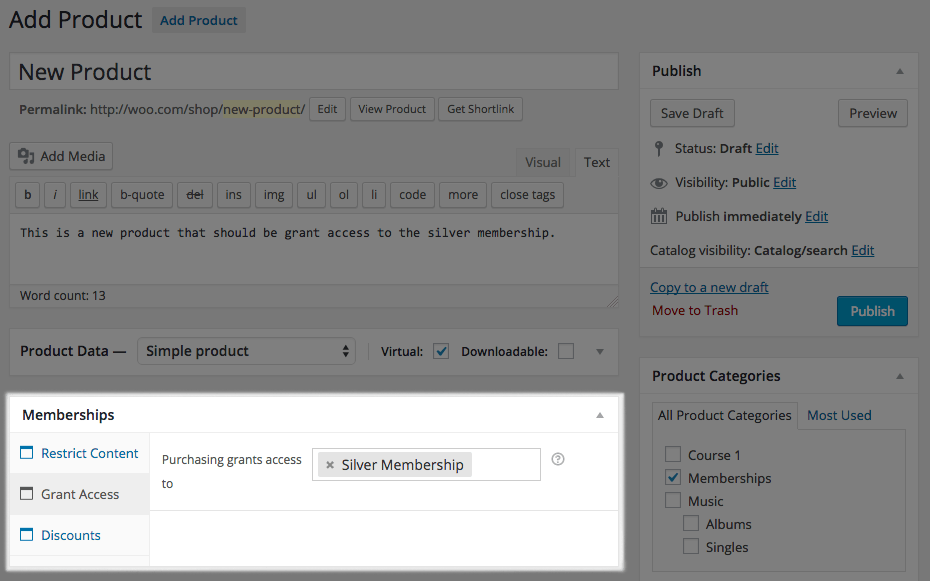
Note that the controls in this meta box will work for simple products, or a variable parent product (meaning the rules will apply to all variations). If you want more fine-tuned control over variations, please use the membership plan page instead.