Setup and Configuration
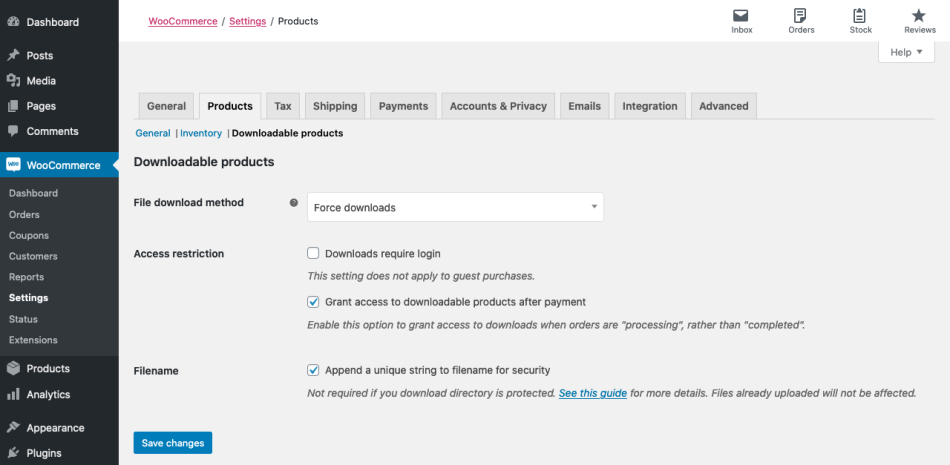
- Go to: WooCommerce > Settings > Products > Downloadable Products.
- Select a File Download Method from the dropdown.
- Force Downloads – File downloads are forced, using PHP. To ensure files are protected from direct linking, Force Downloads can be used. Files are served by PHP. However, if your files are large, or the server is underpowered, you may experience timeouts during download. In this case, you need to either look at your server or use the redirect method.
- X-Accel-Redirect/X-Sendfile – Downloads are handled by the server (nginx/apache). This method requires the X-Accel-Redirect/X-Sendfile module to be installed and enabled on the server. Confirm with your web host that one of these modules is installed before using this method. It’s the most reliable method because the file is served directly to the customer and gives you the best performance. Files are also protected by an
.htaccessfile, making it secure. - Redirect only (insecure) – When users download a file, their link redirects to the file. Using this method means your files will be unprotected and whoever has the upload link will be able to access the file, even when they are not logged in.
- Choose a level of Access Restriction.
- Tick the Downloads Require Login checkbox if you want users to be logged in to download files. Guest checkout would need to be disabled.
- Tick the Grant access to downloadable products after payment checkbox if you wish to grant access to files when orders are Processing, instead of Completed.
- Select Append a unique string to filename for security if you want to make sure that the security of your files is enhanced. It’s recommended to be turned on and will be turned on by default, but it’s not required if someone has properly configured their upload directory. No filename or links will be affected when you turn it on, only files uploaded when this setting is checked will have a unique string added to them. This is setting is fully backward compatible and can be turned off-on at whim without affecting any already generated file links.
- Save changes.
Protecting your uploads directory
By default WooCommerce introduces a .htaccess file to protect your wp-content/uploads/woocommerce_uploads directory, however, this doesn’t guarantee the protection of this directory, since everything depends on the configuration of the server.
Using NGINX Server?
If you using NGINX server for your site along with X-Accel-Redirect/X-Sendfile or Force Downloads download method, it is necessary that you add this configuration for better security:
# Protect WooCommerce upload folder from being accessed directly.
# You may want to change this config if you are using "Redirect Only" method for downloadable products.
# Place this config towards the end of "server" block in nGinx configuration.
location ~* /wp-content/uploads/woocommerce_uploads/ {
    if ( $upstream_http_x_accel_redirect = "" ) {
        return 403;
    }
    internal;
}
And this the configuration in case you are using Redirect only download method:
# Protect WooCommerce upload folder from being accessed directly.
# You may want to change this config if you are using "X-Accel-Redirect/X-Sendfile" or "Force Downloads" method for downloadable products.
# Place this config towards the end of "server" block in nGinx configuration.
location ~* /wp-content/uploads/woocommerce_uploads/ {
    autoindex off;
}
If you do not know which web server you are using, please reach out to your host along with a link to this support page.
Unique String after the Filename
WooCommerce appends a unique string to the filename of uploaded files to enhance security.
It is recommended to be turned on and will be turned on by default, but it’s not required if you have already properly configured your upload directory. No filename or links will be affected when you turn it on, only files uploaded when this setting is checked will have a unique string added to them.
This is setting is fully backwards compatible and can be turned off-on at whim without affecting any already generated file links.
You can access this setting by going to WooCommerce > Settings > Products > Downloadable products.

Creating downloadable products
Downloadable Simple Products
To get started:
- Go to: WooCommerce > Products > Add Product to add a new Simple product as outlined in Adding and Managing Products.
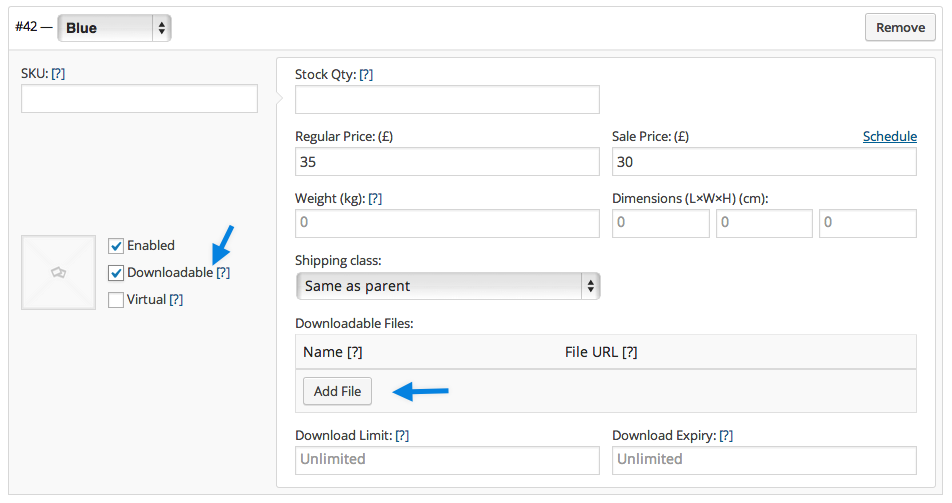
- Tick the Downloadable checkbox.

After ticking this box, other options appear: Downloadable Files, Download Limit, Download Expiry.
- Select the Add file button, and then name the file. Enter the downloadable URL if it’s hosted elsewhere, or select the Choose file button to either insert an existing file from your Media Library or to Upload a new file. Upload the file and click Insert to set up each downloadable file URL. Match the URL of the product to the URL of your site. (i.e., if you have a www in your site URL, then make sure that is in the file URL.)
- Enter “Download limit” (optional). Once a user hits this limit, they can no longer download the file.
- Enter “Download expiry.” If you define a number of days, download links expire after that.
- Save.

Downloadable Variations
Variable products can also have downloadable variations. When adding a variation tick the Downloadable checkbox and more options appear.
Options work the same as regular products: Set the file path, optionally choose a download limit and expiry, and save.
Combining Downloadable and Virtual products
If you tick the Downloadable checkboxes, products can have stock and are treated as physical products. This allows you to sell downloads and real products together.
If you want to add/sell a downloadable product that does not have a physical component, enable the Virtual option.
Usage
The ordering process for downloadable products is:
- The customer adds a downloadable product to their cart.
- The customer checks out and pays.
- After the payment, several things can happen depending on your setup:
- If items in the order are all downloadable + virtual, the order is completed.
- If items are physical and downloadable/virtual, the order is processing until you change it.
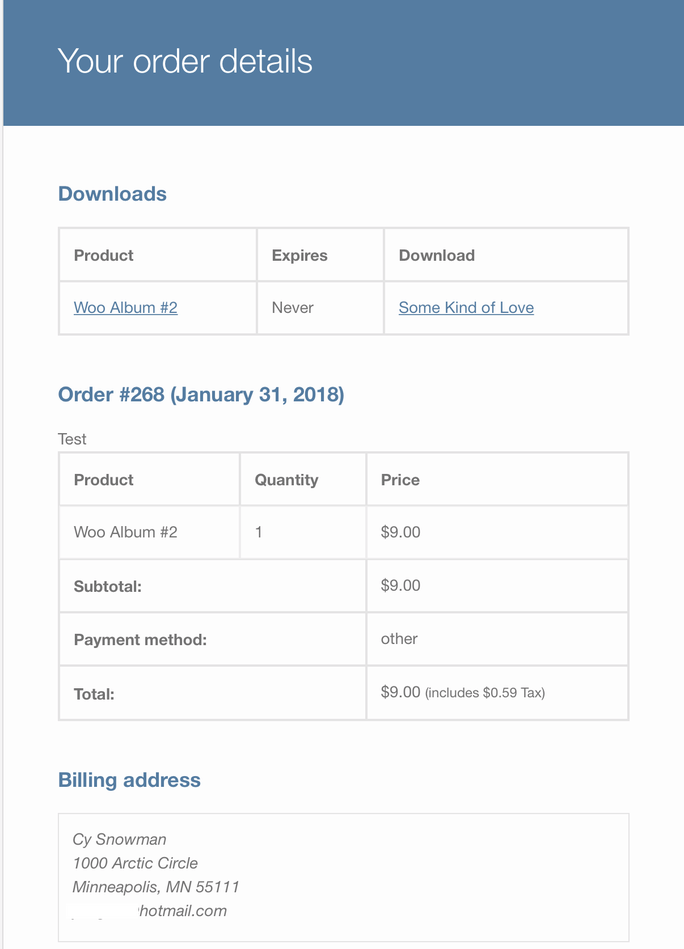
- Once complete, or if the option “Grant access to downloadable products after payment” is enabled, the customer can:
- Be granted download permission
- See download links on the order received page
- See download links in their email notification
- See download links on their ‘My Account’ page if logged in
Customers can then download files.
Invoice/Order Email
The customer receives an invoice/order confirmation with a clickable link to download if the order is processed and paid.
Managing Orders with Downloadable Line items
- Go to: WooCommerce > Orders and select the order to view or edit.
- Scroll down to the Downloadable Product Permissions meta box, which displays the download and how many times the customer had accessed it.
- Revoke access, grant access to new downloads, or exit order.

Download logs/reports
Downloads of digital/downloadable products have unique IDs that are tracked and logged in Reports. More at: WooCommerce Reports.
FAQs
What happens if I edit a downloadable product’s files after customers have purchased it?
- Editing a download file row (changing the name, file URL or both) updates the download links on past purchases, but it leaves the expiry date and downloads remaining intact.
- Adding a new download does not affect past orders. Only new purchasers gain permission to download it.
If you have products that grant ‘lifetime access’ or similar to all downloads added to a product, a subscription or membership may be more appropriate. You can also combine files into a single archive (zip). If you want to restore previous functionality, there is a plugin available here.
Why does WooCommerce link to the URL of the file?
When setting up your downloadable product, ensure that the downloadable file settings use the same URL formatting that your site does. Make sure that it matches the site URL in your WordPress settings. (i.e. if www is in your site URL, it needs to be in the file URL).
Why don’t I see a file link on the order received page?
If you are using PayPal, there is a delay when using the IPN to track payments. You can instead enable Payment Data Transfer (PDT) by going to gateway settings and selecting it as the PayPal Identity Token.
Payment Data Transfer (PDT) is a notification service that, once activated, can send transaction-related information immediately to merchants who are using PayPal payment buttons (PayPal Payments Standard). Merchants can display these transaction details on their website to confirm the buyer’s payment was successful.
You can enable PDT in your PayPal account under Profile > Profile and Settings > My Selling Tools > Website Preferences.
Enable auto-return, and enter the return URL as http://yoursite.com/checkout/order-received/ (replacing yoursite.com with your site’s address), then enable PDT. Copy your identity token to your settings under WooCommerce > Settings > Checkout > Paypal. This will allow payments to be verified without the need for PayPal IPN.
Do old orders get access to new downloads after a product is edited?
No, this feature was removed in WooCommerce 3.0.
Can I use cloud storage to store my files and downloads?
Most definitely! WooCommerce only needs an external URL that points to your digital download file. If it is a valid external download URL, then WooCommerce works perfectly. There is no further validation.
How do I create an album of song downloads to sell music?
It’s possible to do this with Product Bundles (separate purchase). The use case at Create Downloadable Item Packages shows you how.
What file extensions can I use?
WooCommerce allows for the same file extensions defined by WordPress. You can see the full list via WordPress Codex: Uploading Files.
What is the maximum file size that can be used?
WooCommerce itself has no limitation on the maximum file size that can be used, however, your website’s server likely has a maximum limit. Reach out to your hosting company to have that limit increased.