Scenario
Alexi has a recording studio and needs a website where people can book his two rooms.
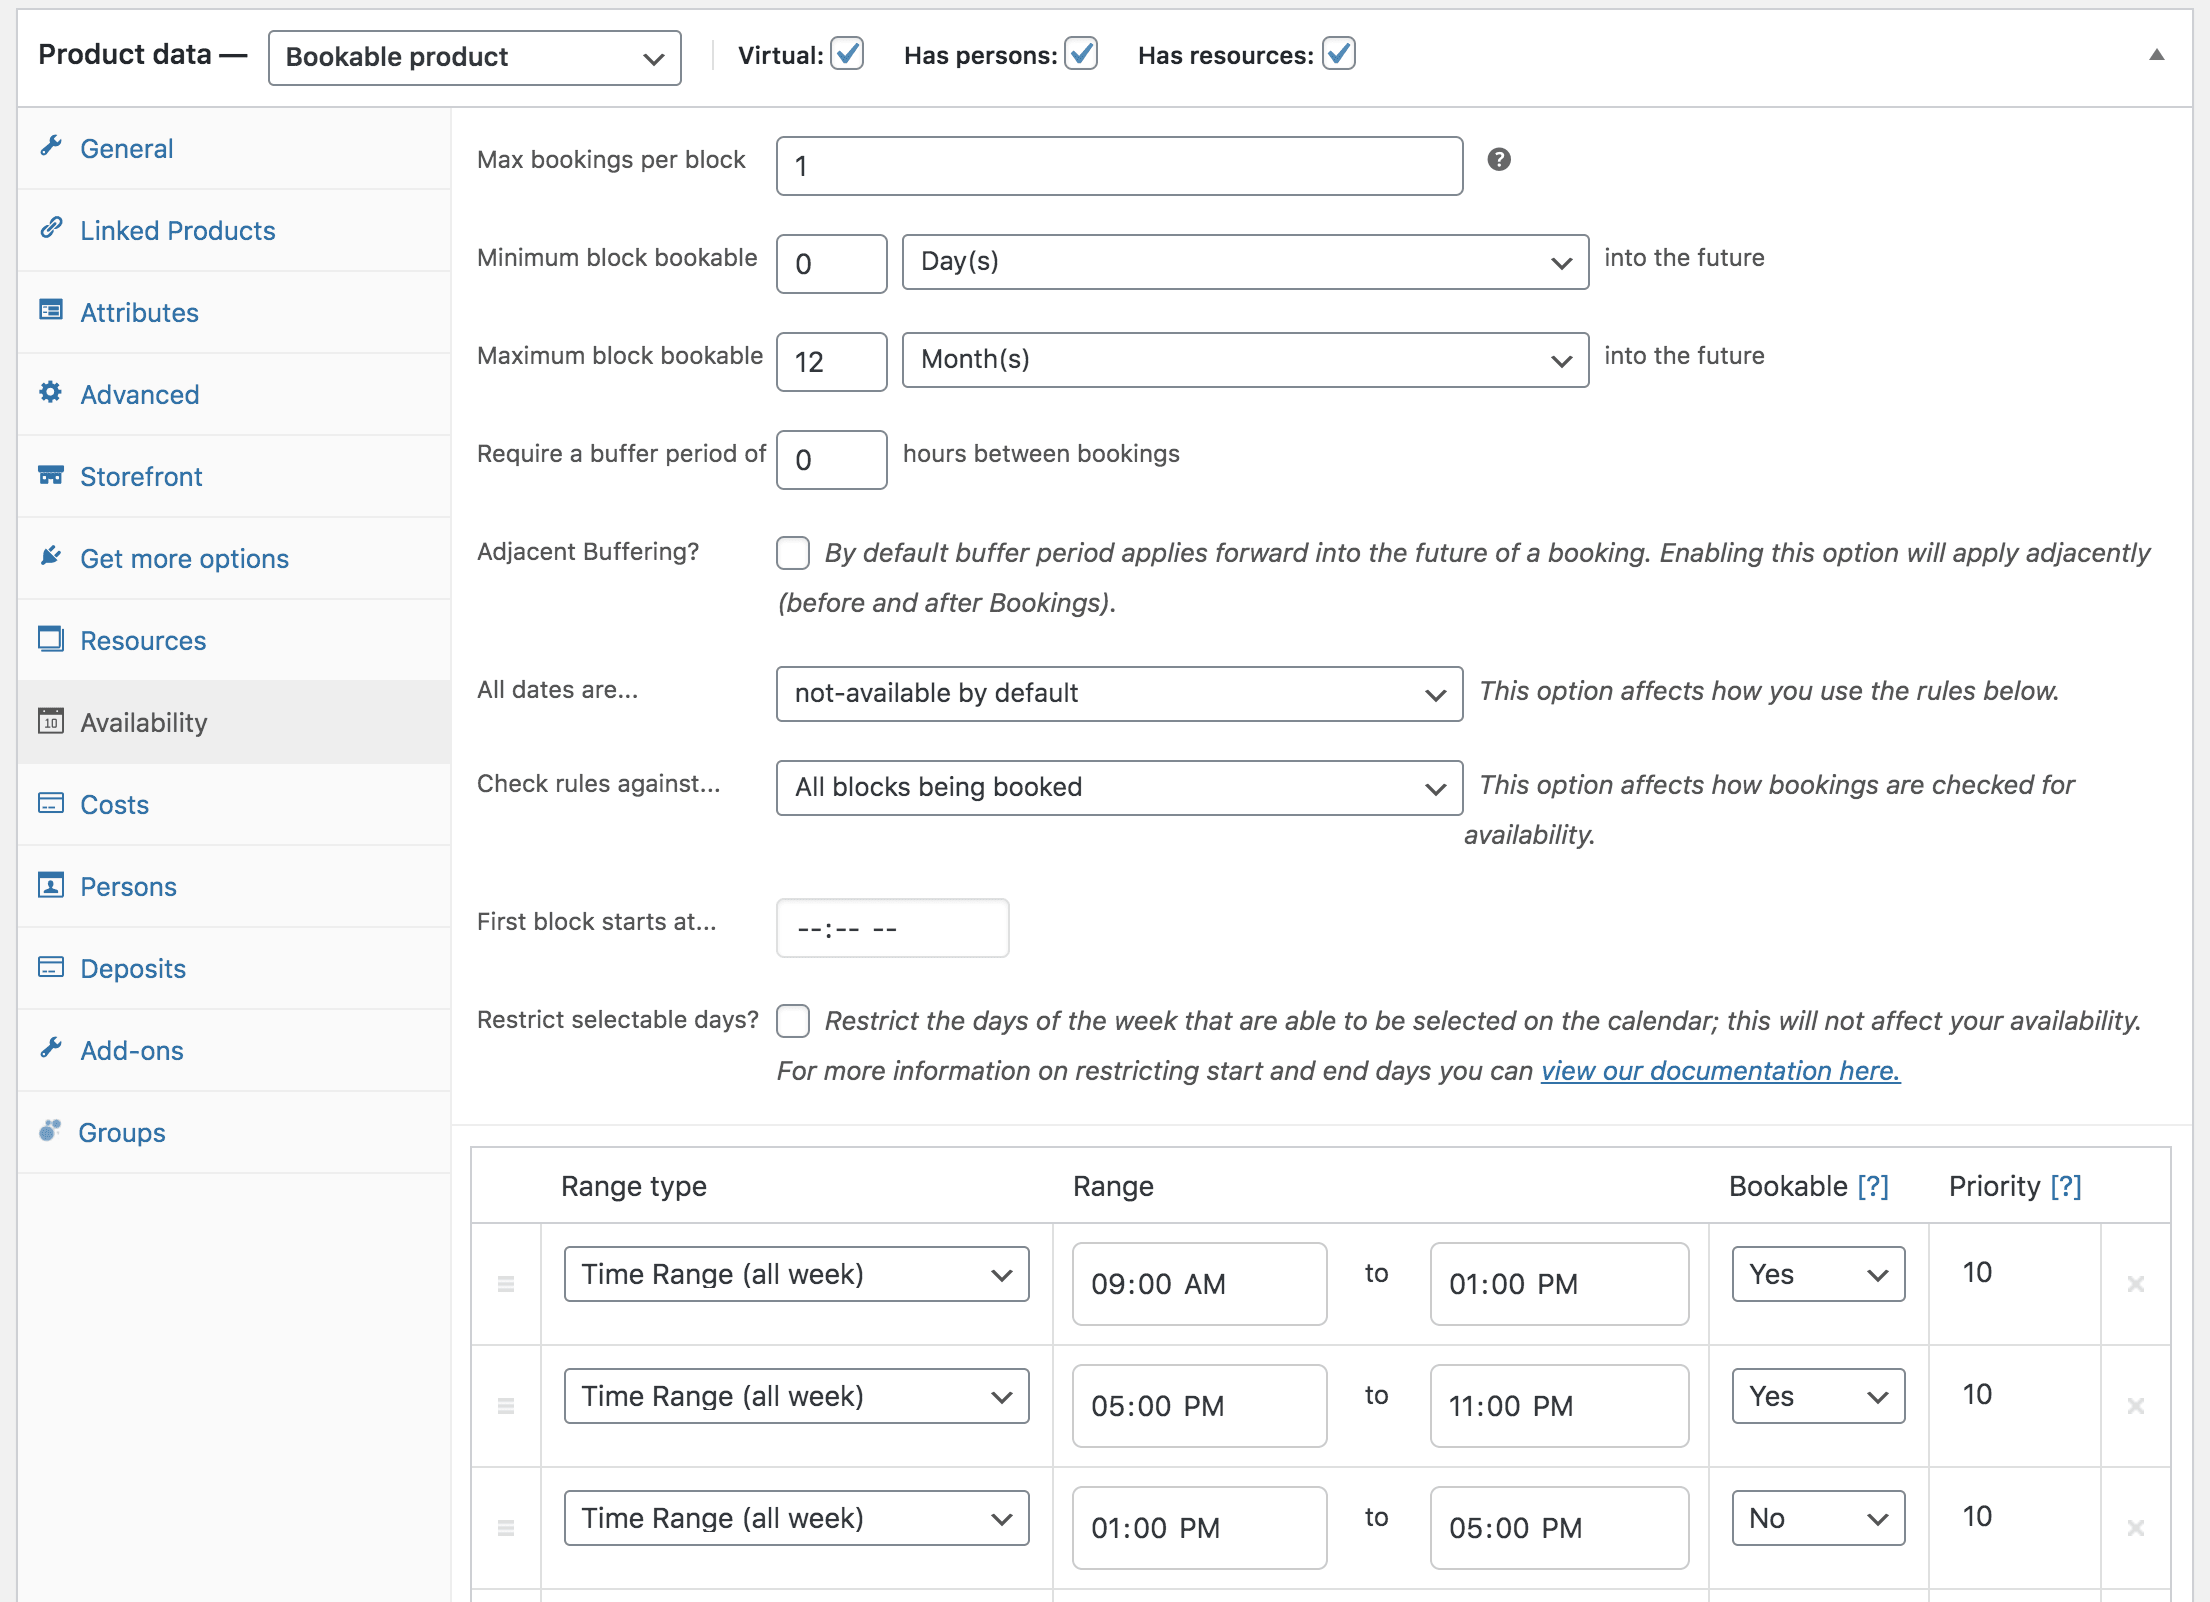
- He is open from 9:00 to 13:00 and 17:00 to 23:00, Monday to Saturday
- He is closed on public holidays and Sundays
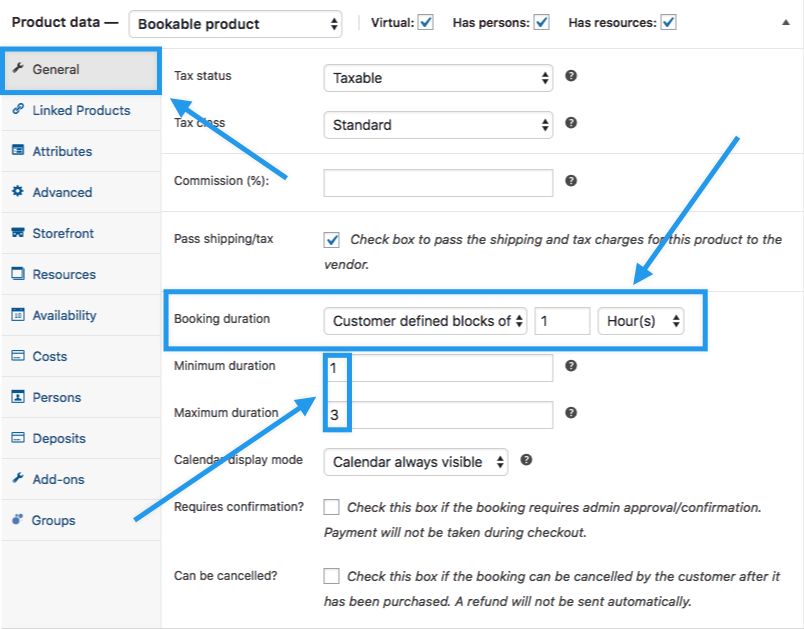
- He wants to rent rooms for a minimum of 1 hour and a maximum of 3 hours per booking
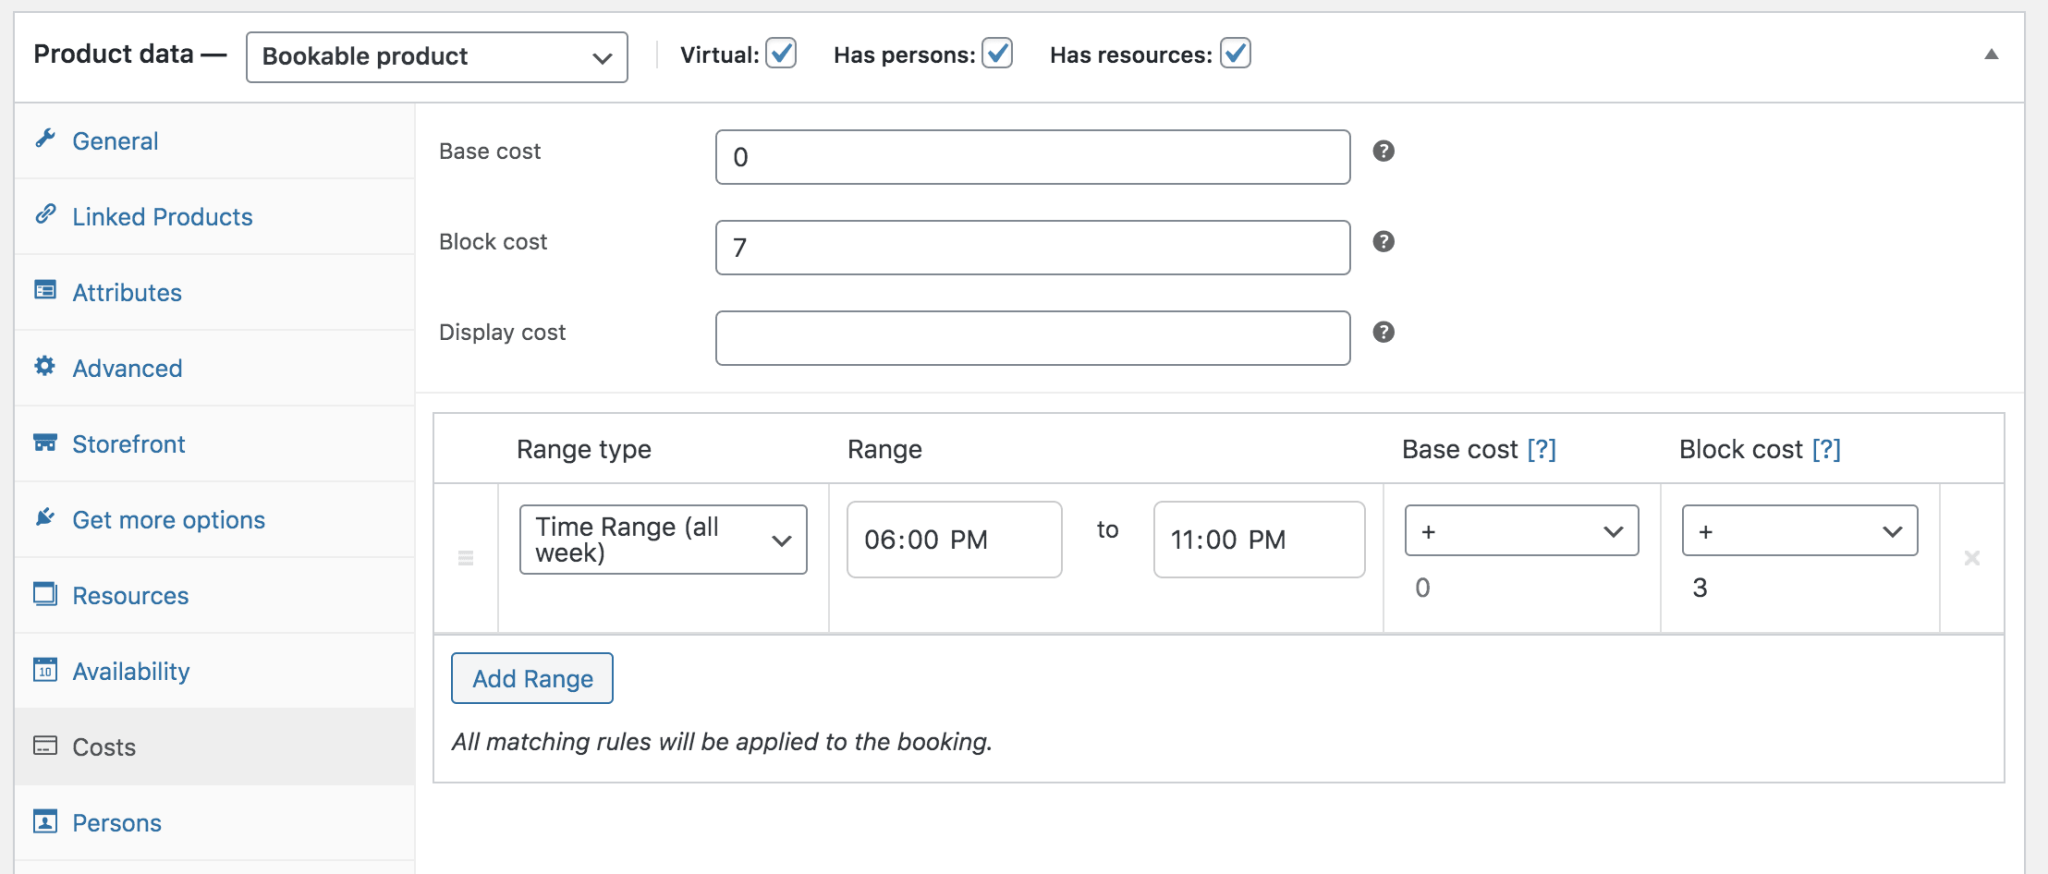
- He wants the price to be $7.00/hour but from 18:00 the rate must be $3.00/hr higher
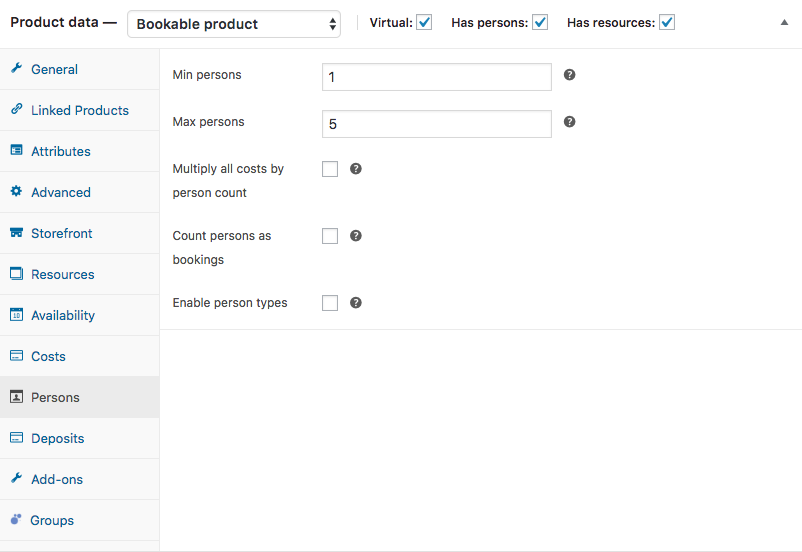
- His rooms are not huge, so the maximum capacity is 5 people per room
- Room #2 is not available on Saturday because he and his friends use it
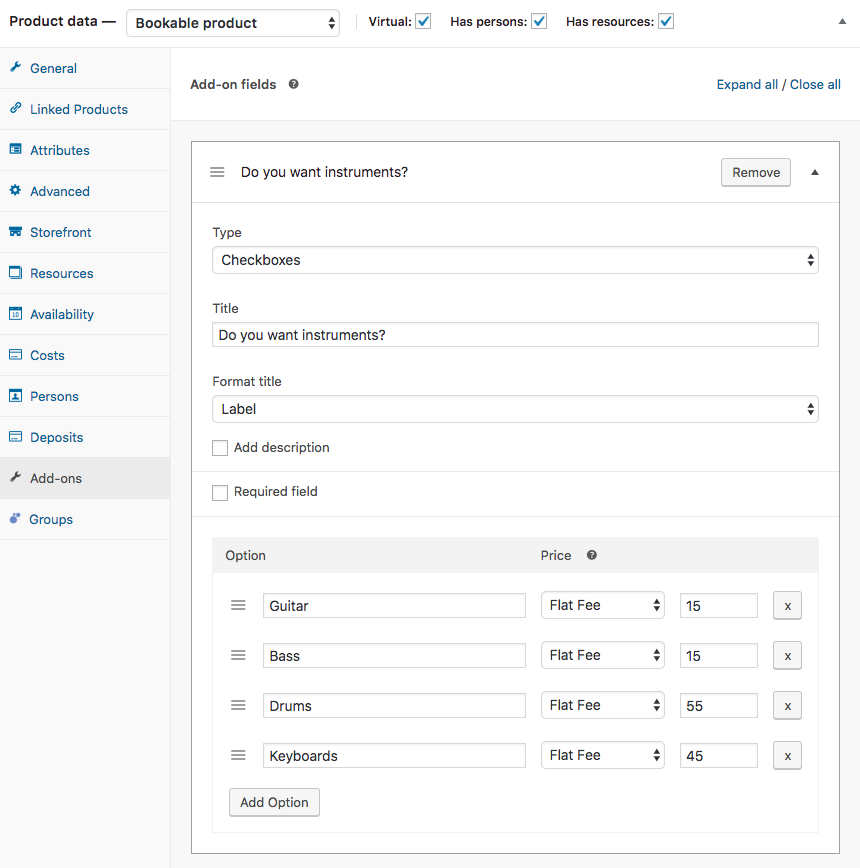
- He can rent instruments, speakers and cables (Optional: WooCommerce Product Add-ons is used for this)

Products Used
Setup and Configuration
These instructions assume you have already set up a bookable product for Recording Studio, according to steps outlined at Create a Bookable Product.
- Go to WooCommerce > Products and select the bookable product for your recording studio.
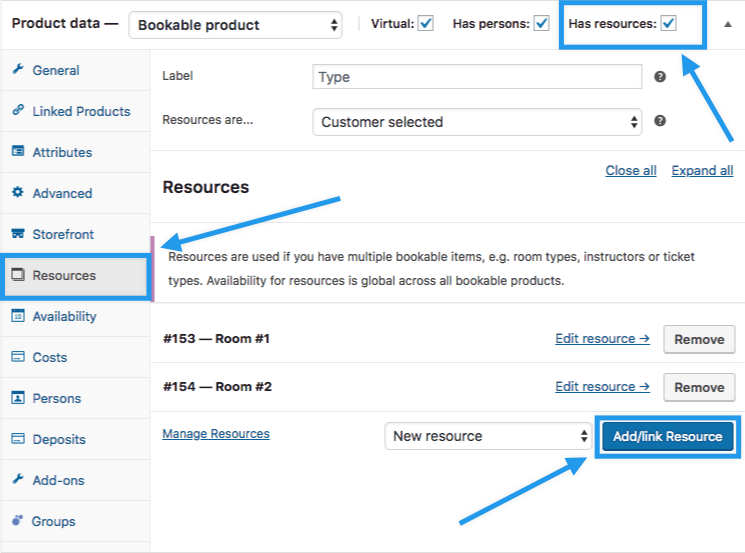
- Tick the box for Has Resources. A Resources tab opens in the left-hand menu.

- Select Add/link Resource to add two rooms as resources.
- Name your resource (e.g., Room 1 or Studio 1) when the window opens, and select OK.
- Repeat steps #3 and #4 to add another resource (e.g., Room 2 or Studio 2).
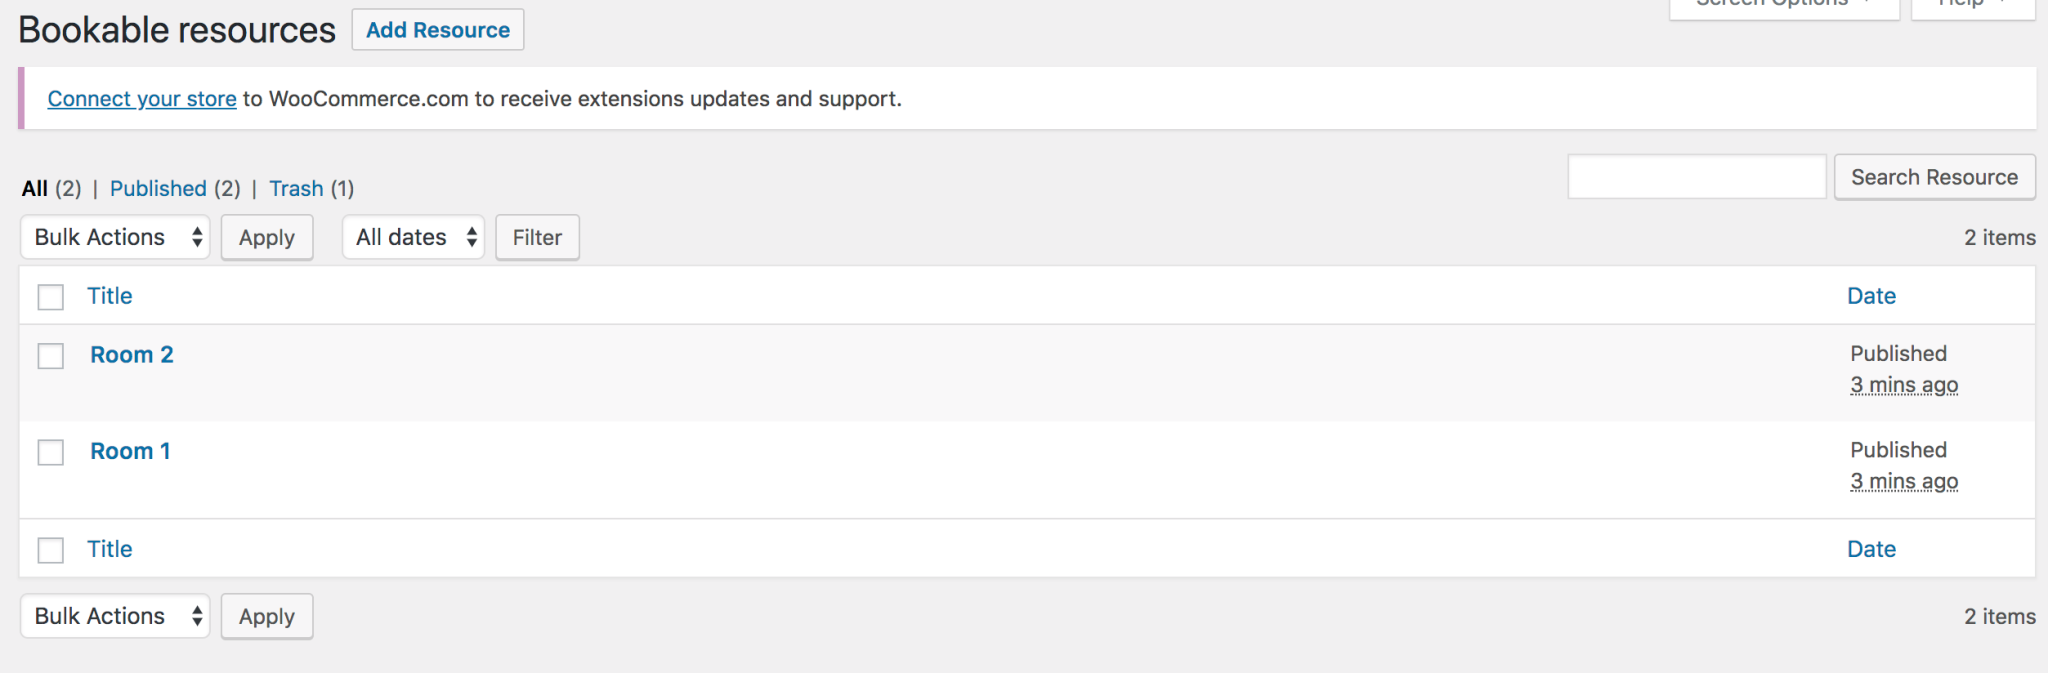
- Select Manage Resources. A new browser tab opens and shows you the Bookable Resources you created.
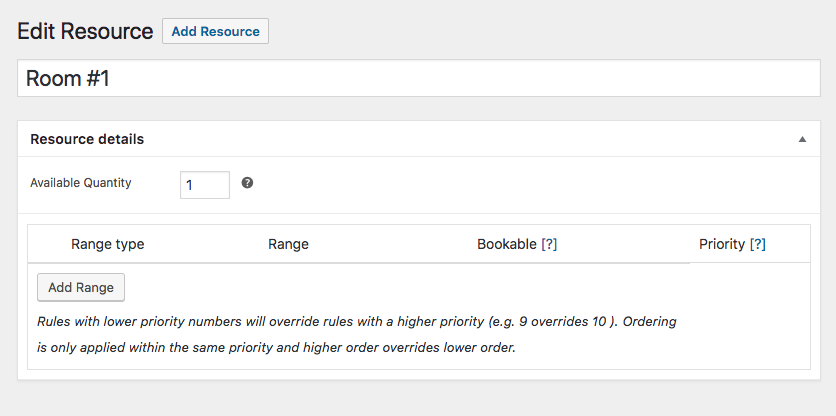
- Select Room 1 or hover over Room 1 and select Edit. Configure the room as shown. Update to save.
Select Room 2 or hover over Room 2 and select Edit > Add Range. Configure the room as shown so it cannot be booked on Saturday. Update to save. - Set the global availability for Sundays and public holidays in Bookings > Settings > Store Availability. They are closed those days, so rooms are not available. Save Changes.


- Return to the Recording Studio bookable product, and go to Product Data. Configure the General, Resources, Availability and Costs tabs as shown.
- Use WooCommerce Product Add-Ons if you wish to add options. Note the tab Add-ons. In this scenario, two options are configured:
- Update to save.
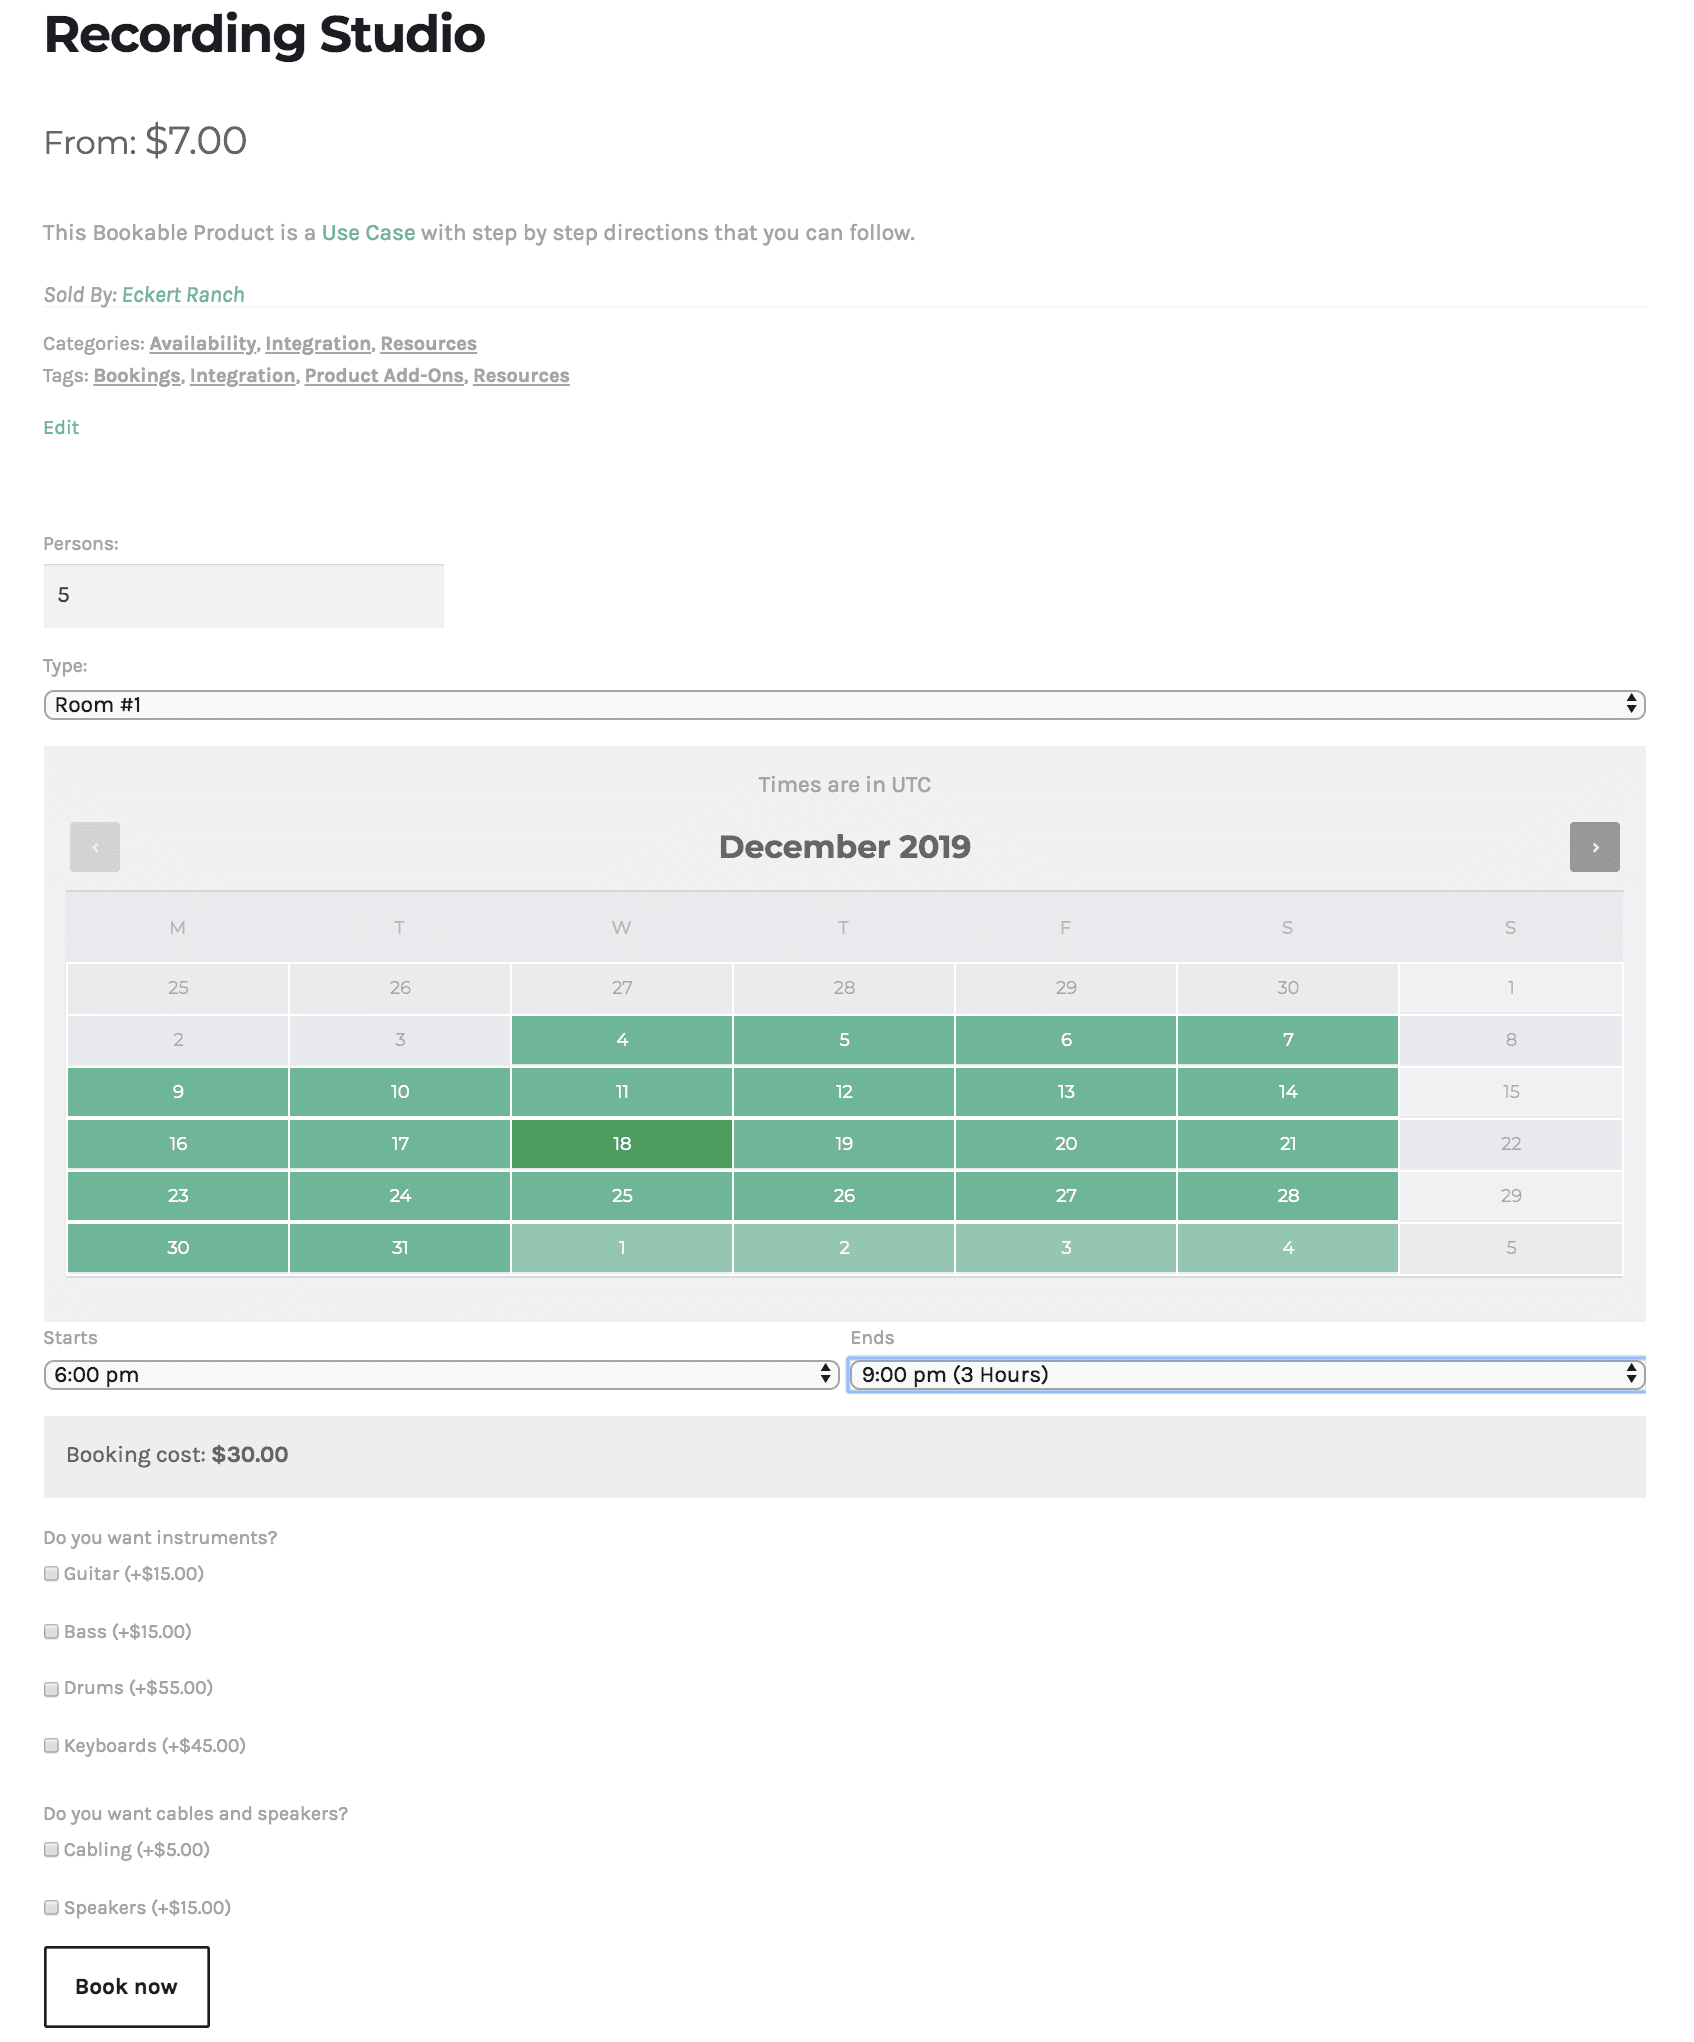
Usage
This is how it looks in the front end.